
 Save
Save
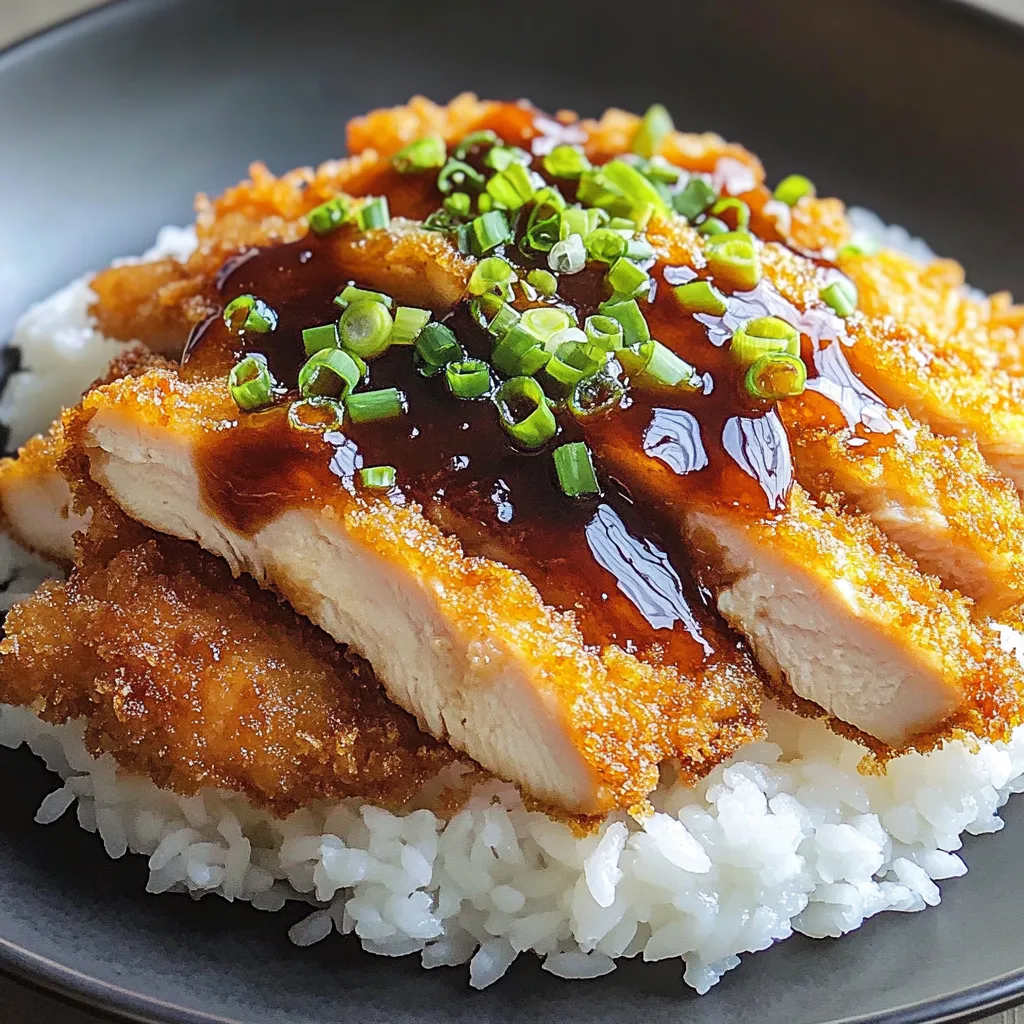
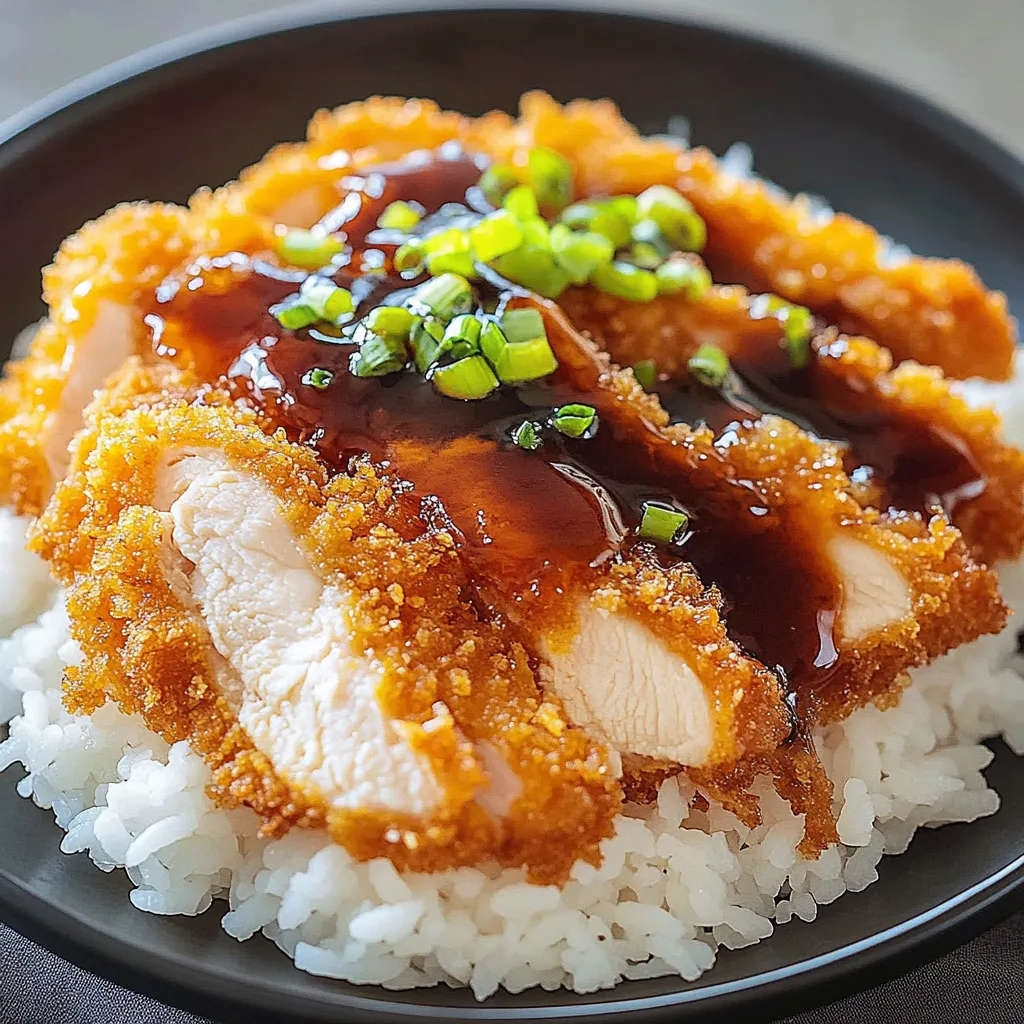
Air fryer chicken katsu delivers the signature crunch and satisfaction of traditional Japanese tonkatsu without the mess or guilt of deep frying. Golden panko-crusted chicken cutlets emerge from the air fryer with a remarkably crispy exterior that gives way to juicy, tender meat inside. The circulating hot air creates the perfect crust while using minimal oil, maintaining the dish's satisfying texture while significantly reducing calories. I discovered this technique during my quest to recreate my favorite restaurant dishes at home with healthier cooking methods, and this version has become a regular in our meal rotation that pleases both adults and children alike.
I first served this to my family after we'd returned from Japan, where my children had fallen in love with tonkatsu. They approached my healthier version with skepticism but were quickly won over by the satisfying crunch. There's something magical about how the air fryer creates that distinctive crispy exterior while keeping the chicken moist and tender inside. Even my mother-in-law, who typically avoids fried foods, requests this dish when she visits. The way it delivers restaurant-quality results without the mess or lingering cooking odors has made it our go-to for satisfying crispy chicken cravings.
Crispy Ingredients
- Boneless Chicken Breasts: Provide a lean protein canvas that becomes remarkably juicy when cooked properly. Pounding to even thickness ensures perfect cooking throughout.
- Japanese Panko Breadcrumbs: Create the signature ultra-crispy coating that defines katsu. These airy, large-flaked breadcrumbs produce a lighter, crunchier crust than regular breadcrumbs.
- All-Purpose Flour: Forms the essential first layer that helps the egg adhere to the chicken. This foundation is crucial for proper breading structure.
- Fresh Eggs: Act as the binding agent that allows the panko to adhere perfectly to the chicken. Their protein structure creates a strong bond between meat and coating.
- Quality Cooking Spray: Delivers just enough oil to achieve golden browning without excess. Higher smoke-point varieties like avocado oil work particularly well.
- Sea Salt: Enhances the chicken's natural flavor when seasoned before breading. Diamond Crystal kosher salt dissolves more evenly than table salt.
- Fresh Black Pepper: Adds subtle heat and depth to the chicken. Freshly ground provides more aromatic complexity than pre-ground varieties.
Cooking Method
- Perfect Chicken Preparation:
- Begin with proper chicken preparation, which establishes the foundation for evenly cooked, tender cutlets. Place boneless, skinless chicken breasts on a cutting board and, using a sharp knife, butterfly each breast horizontally without cutting all the way through. Open the chicken like a book to create a thinner cutlet, which promotes even cooking and maximum crispiness. Place the butterflied breasts between two sheets of plastic wrap or parchment paper. Using a meat mallet or heavy-bottomed pan, gently pound the chicken to a uniform thickness of approximately 1/2 inch. This consistent thickness ensures the chicken cooks evenly and achieves the ideal meat-to-breading ratio characteristic of authentic katsu. Season both sides generously with salt and freshly ground black pepper, which penetrates the meat to enhance flavor from within rather than just on the surface.
- Master Three-Step Breading:
- Set up a proper breading station with three shallow dishes in a row, creating an efficient assembly line that minimizes mess and ensures consistent coating. In the first dish, place all-purpose flour seasoned with a pinch of salt and pepper. In the second dish, beat eggs until completely blended and slightly frothy, which helps create a strong bond with the breadcrumbs. In the third dish, spread panko breadcrumbs in an even layer. Working with one chicken cutlet at a time, dredge first in the flour, shaking off any excess—a thin, even coating is the goal rather than a thick layer. Next, dip the floured cutlet into the beaten egg, ensuring complete coverage while allowing excess to drip off. Finally, press firmly into the panko breadcrumbs on both sides, applying gentle pressure to adhere the breadcrumbs without compressing them. This technique preserves the panko's characteristic airiness that creates the uniquely light, crispy texture of katsu.
- Perfect Air Frying Technique:
- Preheat your air fryer to 400°F for at least 3 minutes, which helps achieve immediate searing when the chicken is added. Lightly spray the air fryer basket with cooking oil to prevent sticking. Place the breaded cutlets in a single layer in the basket without overcrowding—depending on your air fryer size, you may need to cook in batches. Overcrowding prevents proper air circulation, resulting in uneven cooking and reduced crispiness. Spray the top of each cutlet lightly with cooking oil, which helps achieve the golden-brown color and enhances crispiness. Cook for 10 minutes, then carefully flip each cutlet using tongs rather than a fork, which would puncture the meat and release precious juices. Spray the newly exposed side lightly with oil and continue cooking for an additional 5-7 minutes until the exterior is deeply golden and crisp, and the internal temperature reaches 165°F when tested with a meat thermometer at the thickest part. Allow the cooked katsu to rest on a wire rack rather than a plate for 3-5 minutes before slicing, which prevents the bottom from becoming soggy and allows the juices to redistribute within the meat.
I learned about the importance of consistent chicken thickness after serving a batch where the thinner portions were dry while thicker parts remained undercooked. A Japanese chef later showed me how proper butterflying and gentle pounding create uniform cutlets that cook perfectly throughout. My family particularly enjoys this dish served katsu sandwich style for lunch, where the crispy cutlet is paired with shredded cabbage and tonkatsu sauce between soft milk bread. My son has taken to helping with the breading process, developing an impressive technique for creating an even panko coating that rivals restaurant versions.
Perfect Pairings
This versatile chicken shines in multiple presentations. For the classic Japanese experience, serve sliced katsu over steamed short-grain rice with finely shredded cabbage, a drizzle of tonkatsu sauce, and Japanese pickles on the side. The combination of textures and flavors—crispy katsu, fluffy rice, crunchy cabbage, and tangy-sweet sauce—creates a perfectly balanced meal. For a more casual approach, transform it into katsu sandwiches (katsu sando) by placing the cutlet between slices of soft white bread with thinly sliced cabbage and tonkatsu sauce. This portable version makes an excellent packed lunch. For a fusion twist, serve the sliced katsu over curry-flavored rice with Japanese pickles for a simplified take on the popular katsu curry dish. For a lighter option, place sliced katsu atop a salad of mixed greens, shredded cabbage, and julienned carrots with a simple rice vinegar and sesame oil dressing.
Flavorful Variations
Spicy Katsu Kick: Create a heat-infused version by adding a teaspoon of cayenne pepper and a tablespoon of togarashi (Japanese chili pepper mix) to the panko breadcrumbs before breading. Serve with spicy mayo made by combining Japanese mayonnaise with sriracha sauce instead of traditional tonkatsu sauce. The heat builds gradually while still allowing the chicken's flavor to shine through. Pair with cooling cucumber salad to balance the spice.
Herb-Enhanced Breading: Develop a fragrant twist by mixing finely chopped fresh herbs like parsley, thyme, and chives into the panko breadcrumbs. Add a teaspoon of lemon zest to brighten the flavor profile. This variation creates a more aromatic crust while maintaining the essential crispiness. Serve with a herb-infused mayo for dipping and lemon wedges for squeezing over the cutlets just before eating.
Parmesan Panko Fusion: Transform the breading with Italian influence by mixing half a cup of finely grated Parmesan cheese with the panko breadcrumbs along with a teaspoon of dried Italian herbs. The cheese creates a more savory, umami-rich crust that browns beautifully in the air fryer. Serve with marinara sauce for dipping instead of tonkatsu sauce, creating a Japanese-Italian fusion that works surprisingly well.
Storage Success
Refrigeration Method: Store completely cooled katsu in an airtight container lined with paper towels to absorb any moisture that would soften the crust. Place in the refrigerator for up to three days. When stacking multiple pieces, place parchment paper between layers to prevent them from sticking together and maintaining as much crispiness as possible.
Reheating Technique: For the crispiest results when reheating, preheat your air fryer to 350°F and place refrigerated katsu in a single layer in the basket. Reheat for 3-5 minutes until warmed through and the exterior has re-crisped. This method restores much of the original texture without drying out the chicken.
Freezing Strategy: For longer storage, freeze completely cooled katsu by placing pieces on a baking sheet lined with parchment paper and freezing until solid, about 2 hours. Transfer to a freezer-safe container or bag with parchment paper between layers. Freeze for up to two months. Reheat directly from frozen in the air fryer at 350°F for 8-10 minutes until heated through and crispy on the exterior.

Air fryer chicken katsu has become more than just a recipe in my household—it's our solution to the eternal dilemma of wanting satisfying 'fried' food without the unhealthy aspects or cleanup hassle. What I appreciate most is how it makes previously special-occasion restaurant food accessible for regular weeknight meals. The way this recipe preserves the essence of traditional katsu—that perfect crunch giving way to juicy chicken—while adapting to modern, healthier cooking methods represents the kind of practical, no-compromise cooking that forms the backbone of our family meals. Whether served Japanese-style with rice and cabbage or transformed into sandwiches for lunch boxes, it delivers satisfaction and nourishment in equal measure.
Common Questions About Cooking
- → Can I make chicken katsu without an air fryer?
- Yes! You can bake it in a regular oven at 400°F (200°C) for about 18-20 minutes, flipping halfway through. For the traditional method, you can deep fry the breaded cutlets in oil at 350°F (175°C) for 3-4 minutes per side until golden brown and cooked through.
- → How do I make homemade tonkatsu sauce?
- For a quick homemade tonkatsu sauce, mix 4 tablespoons ketchup, 2 tablespoons Worcestershire sauce, 1 tablespoon soy sauce, 1 teaspoon sugar, and 1/4 teaspoon garlic powder. Adjust to taste. For a more authentic version, add 1 tablespoon mirin and 1/2 teaspoon grated ginger.
- → Can I use chicken thighs instead of breasts?
- Absolutely! Boneless, skinless chicken thighs work great for katsu and often result in juicier meat. Pound them to an even thickness (about 1/2 inch) and follow the same cooking instructions, though you may need to add 1-2 minutes to the cooking time.
- → How do I keep the breading from falling off?
- The key is proper technique: 1) Pat the chicken completely dry before starting. 2) Press the breadcrumbs firmly onto the chicken. 3) Let the breaded chicken rest in the refrigerator for 15-20 minutes before cooking to help the coating adhere. 4) Spray with oil rather than brushing, which can dislodge the breadcrumbs.
- → What sides go well with chicken katsu?
- Traditional sides include steamed white rice, finely shredded cabbage with sesame dressing, miso soup, and pickled vegetables like fukujinzuke. For a more substantial meal, add Japanese potato salad or a simple cucumber salad. Katsu also pairs well with curry sauce for Katsu Curry, another popular Japanese dish.