
 Save
Save
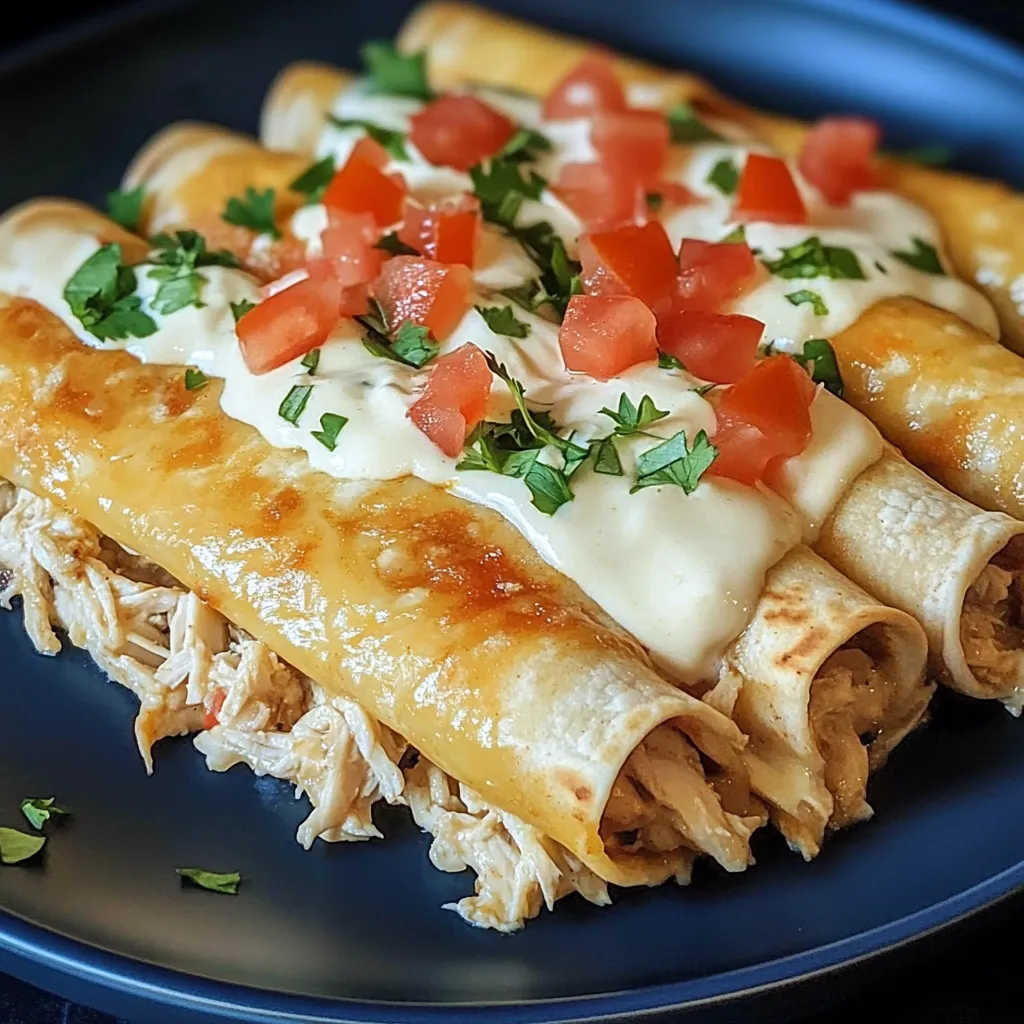
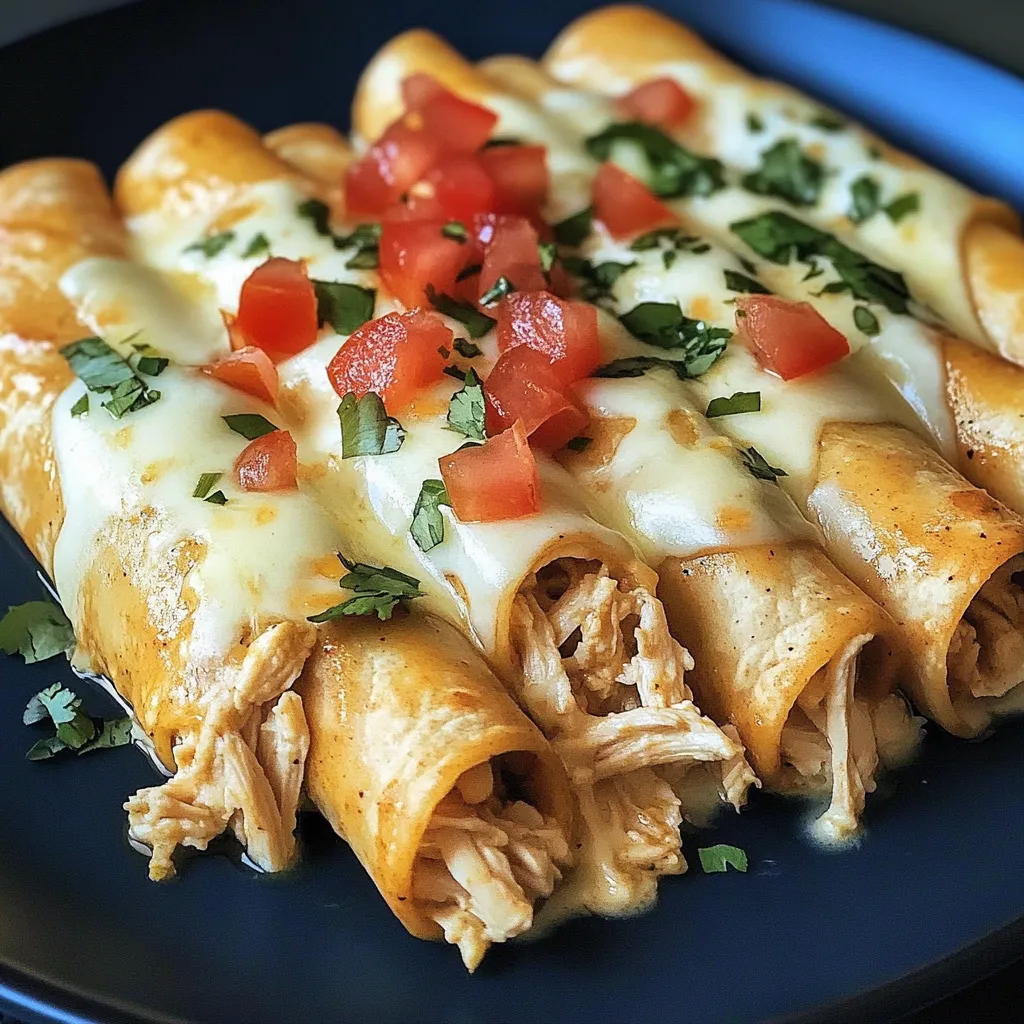
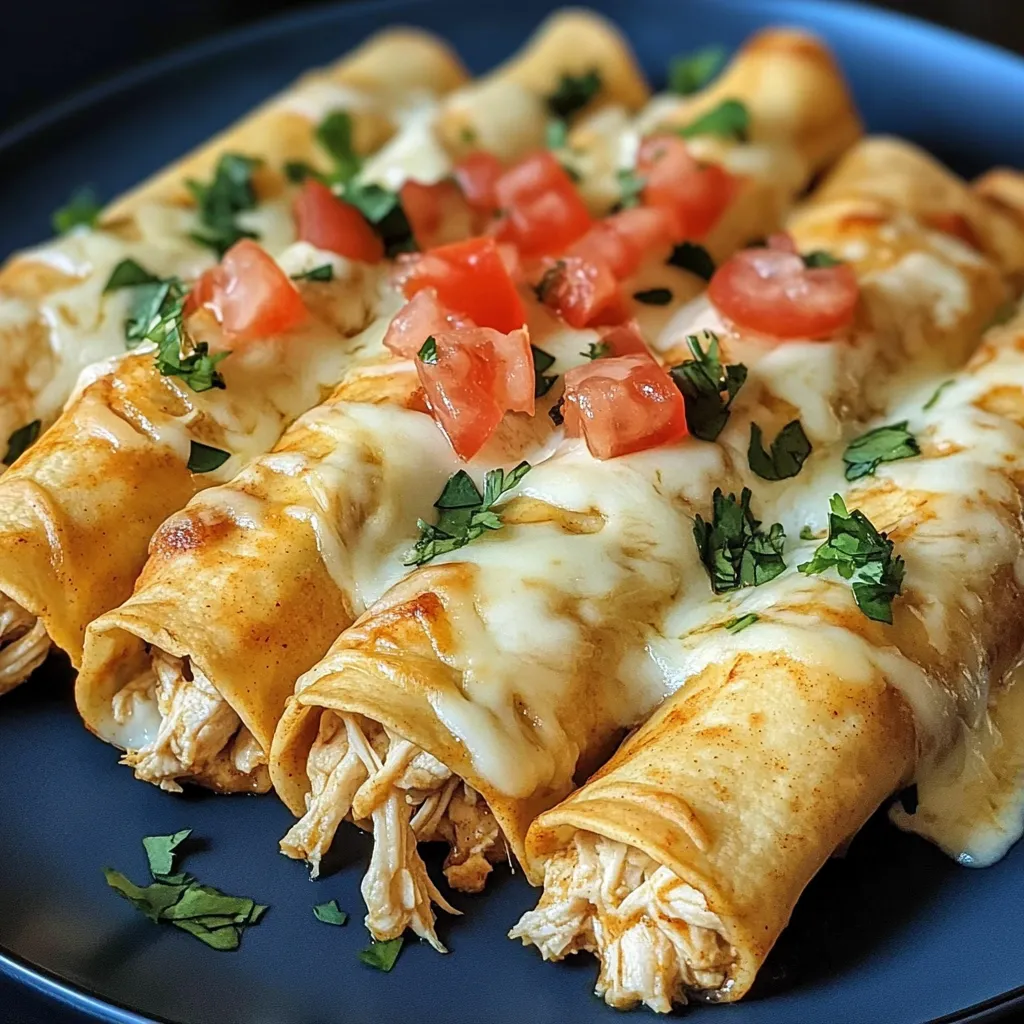
Baked cream cheese chicken taquitos deliver all the satisfying crunch and melty cheese goodness of traditional deep-fried versions without the mess or excess oil. These golden, crispy rolls combine tender shredded chicken with creamy cheese filling, seasoned to perfection and baked until the tortillas turn beautifully golden brown. Perfect for entertaining, family dinners, or game day gatherings, these handheld treats offer restaurant-quality flavor with home kitchen convenience.
The first time I made these taquitos, I was skeptical that baking could achieve the crispy texture I craved from restaurant versions. However, the combination of properly warmed tortillas and strategic oil brushing creates an incredibly satisfying crunch that rivals any deep-fried alternative. My family now requests these regularly, and I love that I can feel good about serving them frequently since they're baked rather than fried.
Quality Ingredient Selection
- Cooked shredded chicken (2 cups): Rotisserie chicken saves time and provides perfectly seasoned, moist meat; leftover roasted chicken works excellently too
- Cream cheese (4 ounces, softened): Creates the signature creamy base that binds everything together; must be room temperature for smooth mixing
- Shredded cheese (1/2 cup): Cheddar provides sharp flavor while Monterey Jack offers mildness; mix both for complex taste
- Quality salsa (1/4 cup): Choose your preferred heat level; fresh salsa adds better flavor than jarred varieties
- Ground cumin (1 teaspoon): Essential for authentic Mexican flavor that complements the chicken beautifully
- Chili powder (1 teaspoon): Adds warmth and depth without overwhelming heat; use pure chili powder rather than blends
- Small tortillas (8-10 count, 6-inch): Flour tortillas roll easier and stay tender, while corn tortillas offer authentic flavor and gluten-free option
- High-quality olive oil or cooking spray: Essential for achieving golden, crispy exterior during baking process
- Fresh green onions or cilantro (1/4 cup chopped): Optional but highly recommended for brightness and color contrast
- Sea salt and freshly ground black pepper: For proper seasoning balance throughout the filling mixture
Perfect Preparation Method
- Creating Optimal Conditions
- Preheat your oven to 400°F and line a large baking sheet with parchment paper, which prevents sticking and makes cleanup effortless. Warm tortillas in the microwave for 20-30 seconds wrapped in slightly damp paper towels, making them pliable and preventing cracking during the rolling process. This step is crucial for achieving tightly rolled taquitos that won't open during baking.
- Preparing Flavorful Filling
- In a medium mixing bowl, combine softened cream cheese with shredded chicken, breaking up any large chunks of meat with a fork until evenly distributed. Add shredded cheese, salsa, cumin, chili powder, salt, and pepper, mixing thoroughly until all ingredients are well incorporated and the mixture holds together cohesively. Taste and adjust seasoning as needed, remembering that the flavors will intensify slightly during baking.
- Rolling Technique Mastery
- Place a warm tortilla on a clean, flat surface and spoon 2-3 tablespoons of filling in a line across the center, leaving space at both ends to prevent spillage. Roll the tortilla tightly around the filling, starting from one edge and keeping constant pressure to eliminate air pockets. Place each completed taquito seam-side down on the prepared baking sheet to prevent unrolling during baking.
- Achieving Golden Crispiness
- Brush or spray each rolled taquito lightly with olive oil, ensuring complete coverage for even browning and maximum crispiness. The oil helps the tortillas develop that coveted golden color and crunchy texture that makes these taquitos so irresistible. Space them evenly on the baking sheet to allow proper air circulation during cooking.
- Baking to Perfection
- Bake for 15-20 minutes, flipping each taquito carefully halfway through to ensure even browning on all sides. The finished taquitos should be golden brown and crispy to the touch, with no soft spots remaining. For extra crispiness, broil for 1-2 minutes at the end, watching carefully to prevent burning.
 Save
Save
I learned through trial and error that the key to perfect taquitos lies in balancing moisture levels and temperature control. The cream cheese provides binding power while the salsa adds moisture, but too much liquid causes soggy results. The chicken should be well-drained if using rotisserie chicken, and any excess liquid should be absorbed with paper towels before mixing the filling.
Creative Flavor Variations
Transform these basic taquitos by incorporating different proteins and flavor profiles that complement the creamy base beautifully. Pulled pork or shredded beef work wonderfully as chicken alternatives, while black beans and corn create satisfying vegetarian versions. Adding diced jalapeños, poblano peppers, or chipotle peppers in adobo creates varying levels of heat and smokiness.
Serving Excellence
These versatile taquitos shine as appetizers when served with an array of dipping sauces including guacamole, sour cream, salsa verde, and pico de gallo. The variety of textures and flavors allows guests to customize each bite according to their preferences, making them perfect for parties and gatherings.
Storage Solutions
Store leftover taquitos in airtight containers in the refrigerator for up to 3 days, though they're definitely best enjoyed fresh and warm when the tortillas maintain their optimal crispiness. The filling flavors actually improve slightly overnight as the seasonings meld together more completely.
Make-Ahead Strategies
The beauty of this recipe lies in its make-ahead versatility, perfect for busy schedules or entertaining preparation. Assemble the taquitos completely and refrigerate for up to 24 hours before baking, covering them tightly to prevent the tortillas from drying out.
 Save
Save
These baked cream cheese chicken taquitos have revolutionized my approach to Mexican-inspired entertaining because they deliver all the satisfaction of traditional fried versions while being significantly easier and healthier to prepare. The technique is so reliable that I can confidently make them for any gathering, knowing they'll consistently turn out crispy, flavorful, and crowd-pleasing. Every time I serve them, I'm reminded that sometimes the best recipes are those that take familiar flavors and present them in a way that's both accessible and impressive.
Common Questions About Cooking
- → Can I use corn tortillas instead of flour?
- Yes! Just warm them in a damp paper towel in the microwave for 20 seconds to make them flexible and prevent cracking.
- → How do I prevent the taquitos from getting soggy?
- Make sure to brush them with oil before baking and place them seam-side down on the baking sheet for best results.
- → Can I make these ahead of time?
- Absolutely! Assemble them, freeze on a baking sheet, then store in freezer bags. Bake straight from frozen with a few extra minutes.
- → What dipping sauces go best with these?
- Guacamole, sour cream, salsa, and pico de gallo are all perfect choices. You can also try ranch or queso dip.
- → How long do leftover taquitos stay fresh?
- Store them in the fridge for up to 3 days. Reheat in the oven at 350°F for 5-7 minutes to crisp them back up.
- → Can I add vegetables to the filling?
- Sure! Diced bell peppers, jalapeños, or corn work great. Just make sure any vegetables are cooked and drained first.