
 Save
Save
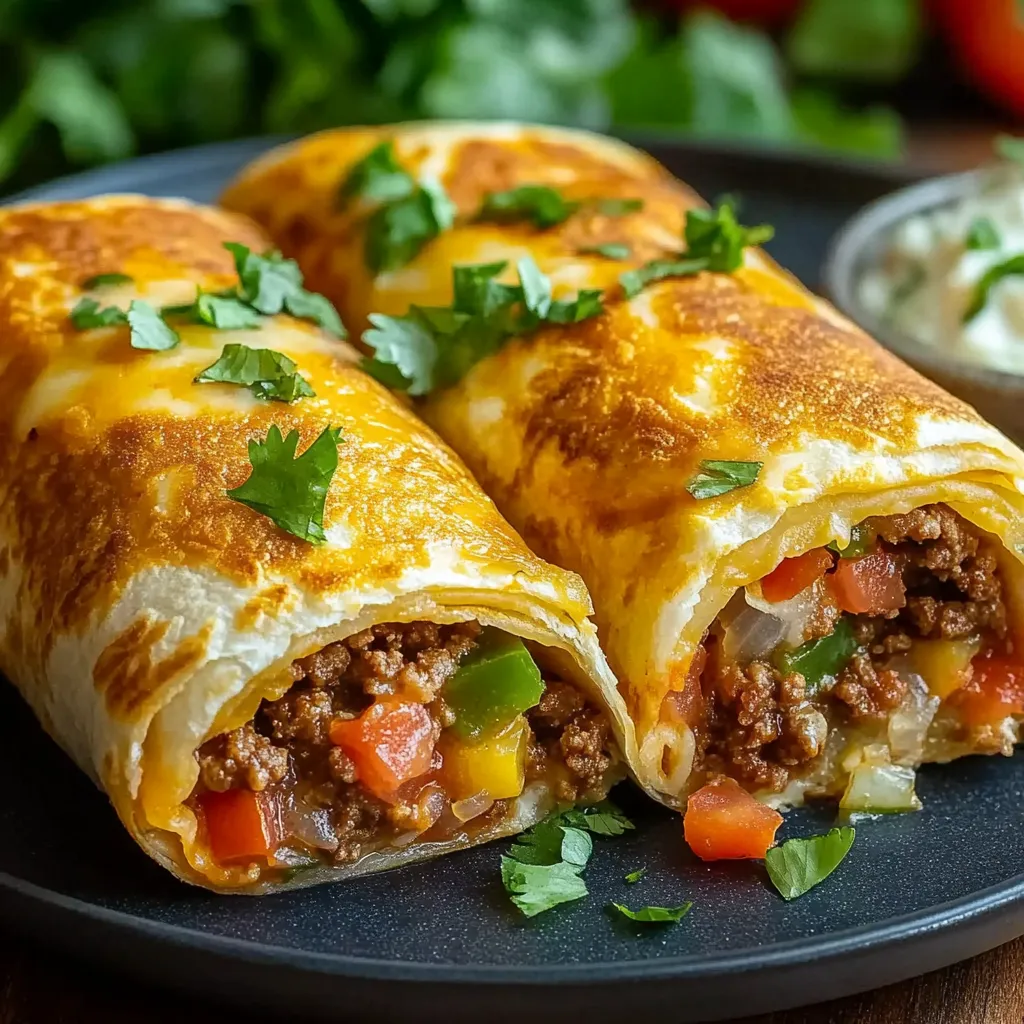
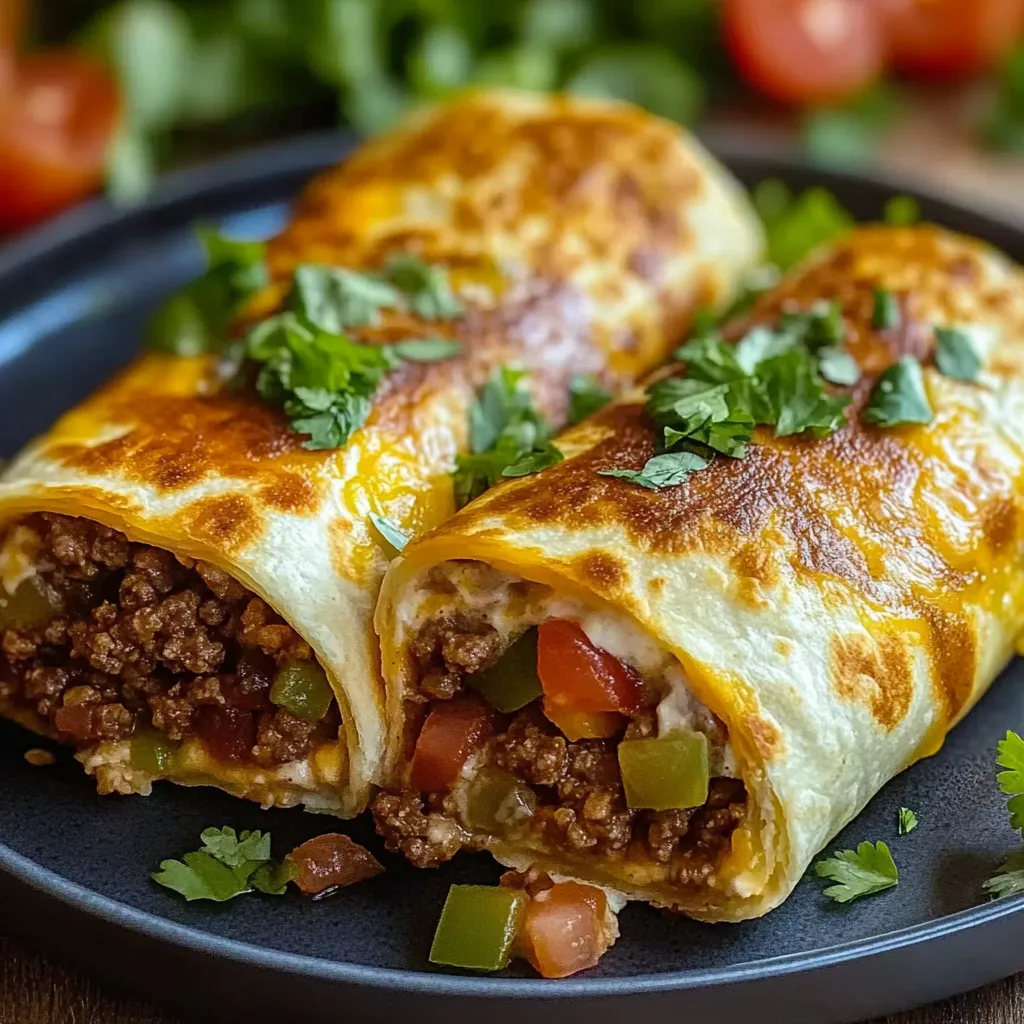
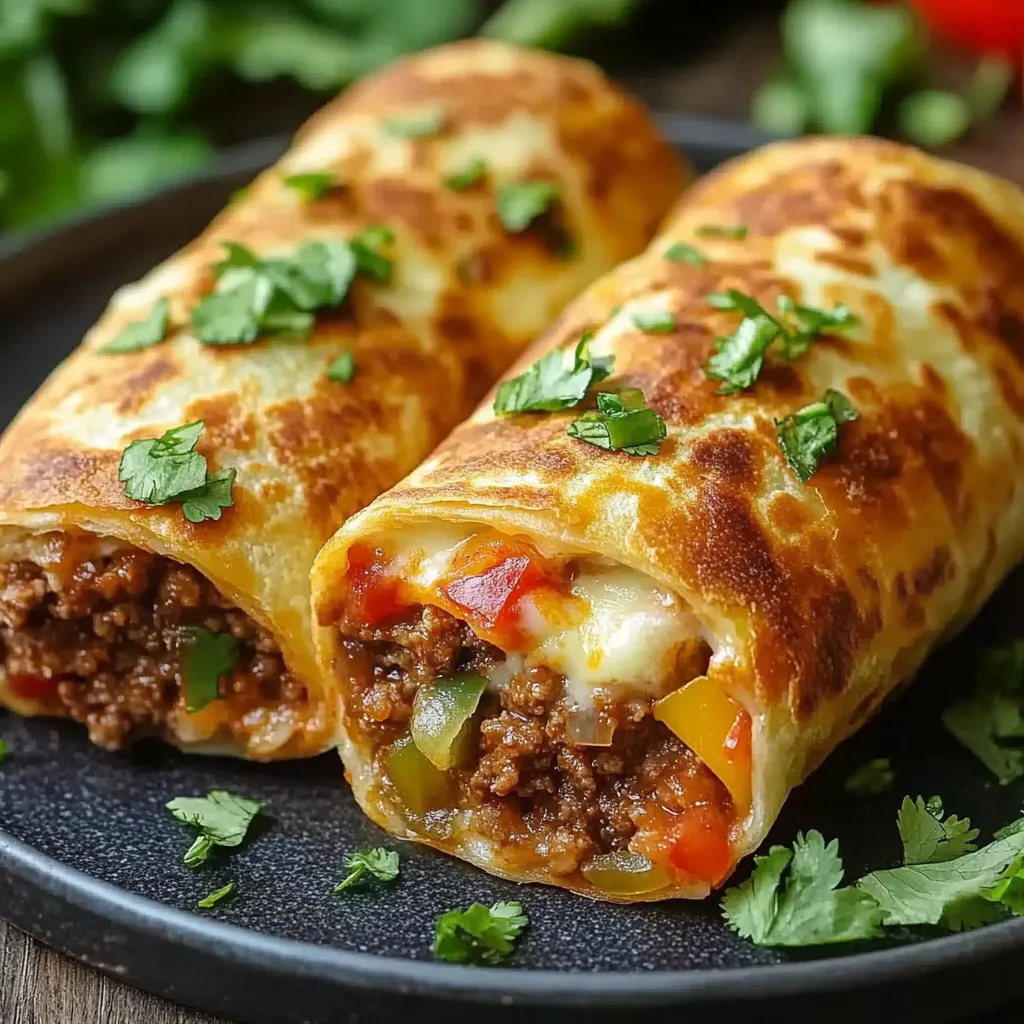
Beef and cheese chimichangas deliver the perfect combination of crispy golden tortillas wrapped around savory seasoned beef and melted cheese, creating restaurant-quality Mexican comfort food in your own kitchen. These handheld delights can be prepared using three different cooking methods - traditional frying, healthier baking, or convenient air frying - each producing deliciously crispy results with varying textures and oil content. Whether you're planning family dinner, entertaining guests, or meal prepping for the week, these customizable chimichangas satisfy every craving for bold Mexican flavors.
I developed this recipe after countless attempts to recreate the perfect chimichanga from my favorite Mexican restaurant, and finally achieved that ideal balance of crispy exterior and flavorful filling. The breakthrough came when I perfected the seasoning blend and discovered the importance of proper rolling technique. My family now considers these our signature Mexican night dish, and friends consistently request the recipe after trying them.
Premium Ingredient Selection
- Ground beef (1 pound): Choose 80/20 blend for optimal flavor and moisture; leaner varieties can become dry during cooking
- Yellow onion (1/2 small, diced): Adds aromatic sweetness that balances the spices beautifully; dice finely for even distribution
- Fresh garlic (2 cloves, minced): Provides essential aromatic foundation; fresh garlic delivers superior flavor to pre-minced alternatives
- Chili powder (1 teaspoon): Choose pure chili powder rather than blends for authentic, clean flavor without unwanted additives
- Ground cumin (1 teaspoon): Essential for authentic Mexican flavor profile; provides earthy, warm notes that complement beef perfectly
- Paprika (1/2 teaspoon): Adds color and subtle smokiness; smoked paprika can intensify flavor if preferred
- Quality tomato sauce (1/2 cup): Choose thick, well-seasoned varieties that won't make filling too watery
- Beef broth (1/4 cup): Adds depth and helps create proper filling consistency; low-sodium varieties allow better seasoning control
- Large flour tortillas (6 count): Must be fresh and pliable; burrito-sized tortillas work best for proper rolling and containment
- Shredded cheese (1 cup): Monterey Jack, cheddar, or Mexican blend all melt beautifully; avoid pre-shredded for superior melting
- Neutral oil for frying: Vegetable or canola oil with high smoke point; need enough for proper deep frying if using traditional method
Perfect Filling Preparation
Building Flavor Foundation
Heat a large skillet over medium-high heat and add ground beef, breaking it into small, uniform pieces with a wooden spoon as it browns. Cook for 5-6 minutes until no pink remains, then add diced onion and continue cooking for 2-3 minutes until onion softens and becomes fragrant. The browning process creates essential flavor compounds that form the base of the filling.
Incorporating Spice Blend
Add minced garlic and cook for 30 seconds until aromatic, then stir in chili powder, cumin, paprika, salt, and black pepper, coating the meat mixture evenly. Cook the spices for 1-2 minutes to bloom their flavors and eliminate any raw taste, creating depth and complexity throughout the filling.
Creating Perfect Consistency
Pour in tomato sauce and beef broth, stirring to combine thoroughly with the seasoned meat mixture. Simmer for 5 minutes, stirring occasionally, until the liquid reduces and the mixture reaches a cohesive consistency that holds together without being dry or overly wet. The filling should be moist but not saucy to prevent tortilla sogginess.
Masterful Assembly Technique
Preparing Work Surface
Lay large flour tortillas on a clean, flat surface and allow them to come to room temperature if refrigerated, which makes them more pliable and less likely to crack during rolling. Have all filling components ready and within easy reach for efficient assembly.
Proper Filling Placement
Spoon approximately 1/3 cup of beef mixture into the center of each tortilla, creating a horizontal line of filling that leaves adequate space on all sides for folding. Top the beef with shredded cheese, distributing it evenly over the meat to ensure every bite contains melted cheese.
Rolling Technique Mastery
Fold the left and right sides of the tortilla inward over the filling, then starting from the bottom edge, roll tightly toward the top, creating a compact cylinder. The sides should remain tucked in throughout the rolling process to prevent filling from escaping during cooking. Place each completed chimichanga seam-side down to help maintain its shape.
Cooking Method Excellence
Traditional Frying Method
Heat oil in a heavy-bottomed pot to exactly 350°F, using a reliable thermometer to monitor temperature throughout cooking. Carefully place chimichangas seam-side down first to seal them closed, then fry for 2-3 minutes per side until deep golden brown and crispy. Remove with tongs and drain on paper towels to absorb excess oil.
Healthier Baking Option
Preheat oven to 400°F and brush each chimichanga with melted butter or oil to promote browning and crispiness. Place on a baking sheet seam-side down and bake for 20-25 minutes, flipping halfway through, until golden brown and crispy on all surfaces.
Air Fryer Convenience
Preheat air fryer to 375°F and lightly spray chimichangas with cooking oil for optimal browning. Cook in single layer for 8-10 minutes, flipping halfway through, until golden and crispy. This method provides excellent results with minimal oil usage.
Through extensive testing of all three cooking methods, I've learned that each produces distinct textures and flavors. Frying creates maximum crispiness with rich flavor, baking provides healthier results with good texture, and air frying offers convenience with excellent crispiness. The key to success lies in proper temperature control and not rushing the cooking process.
Creative Variations
Transform this basic recipe by substituting different proteins that complement the Mexican spice blend beautifully. Shredded rotisserie chicken creates lighter versions, while ground turkey provides leaner alternatives. Carnitas or pulled pork create rich, indulgent variations perfect for special occasions.
For vegetarian options, substitute black beans, bell peppers, mushrooms, and corn for the meat, maintaining the same seasoning profile. These plant-based versions provide satisfying texture and bold flavors that even meat lovers appreciate.
Spice variations can completely change the character - add diced jalapeños for heat, chipotle peppers for smokiness, or green chiles for authentic southwestern flavor. Different cheese combinations create unique taste profiles too.
Serving Excellence
Serve these crispy chimichangas with an array of traditional Mexican accompaniments that enhance the overall dining experience. Fresh guacamole provides creamy richness that balances the crispy exterior, while sour cream adds cooling contrast to the seasoned beef filling.
Salsa verde or pico de gallo provides acidic brightness that cuts through the rich cheese and fried coating, while Mexican rice and refried beans create complete, satisfying meals. The combination of textures and flavors creates restaurant-quality presentations at home.
Consider serving family-style with all accompaniments available for customization, allowing each person to create their perfect combination of flavors and textures according to personal preferences.
Storage Solutions
Store leftover chimichangas wrapped individually in aluminum foil in the refrigerator for up to 4 days, though they're definitely best enjoyed fresh when the coating maintains optimal crispiness. The filling flavors actually improve slightly overnight as seasonings meld together.
For longer storage, wrap completely cooled chimichangas tightly in foil and freeze for up to 3 months. This method allows you to prepare large batches during convenient times, then enjoy homemade chimichangas whenever cravings strike.
To reheat, use oven or air fryer methods rather than microwaving, which creates soggy textures. Frozen chimichangas can be reheated directly without thawing, adding a few extra minutes to cooking time.
Make-Ahead Strategies
This recipe excels at make-ahead preparation, perfect for busy schedules or entertaining. The beef filling can be prepared up to 3 days in advance and stored covered in the refrigerator, actually improving in flavor as ingredients meld together.
Assemble chimichangas completely and freeze them uncooked on baking sheets until solid, then transfer to freezer bags. This approach provides ultimate convenience - simply cook directly from frozen using any of the three methods when ready to serve.
For meal prep, prepare large batches and portion into family-sized servings, creating quick dinner solutions that require minimal effort while delivering maximum satisfaction.
These beef and cheese chimichangas have become my family's most requested Mexican dish because they deliver authentic restaurant flavors with home kitchen convenience. The versatility of cooking methods means I can adapt to any situation - quick air frying for weeknight dinners, traditional frying for special occasions, or healthy baking when we want lighter options. Every time I make them, I'm reminded that the best comfort foods are those that combine familiar techniques with bold flavors, creating dishes that satisfy both hunger and soul.
Common Questions About Cooking
- → Can I make these ahead of time?
- Yes! Assemble them and keep covered in the fridge for up to a day before cooking. They're perfect for meal prep.
- → Which cooking method gives the crispiest results?
- Deep frying gives the crispiest texture, but air frying comes very close and is much healthier. Baking is the lightest option.
- → How do I prevent them from falling apart?
- Don't overfill them, roll tightly, and always cook seam-side down first to help seal them properly.
- → Can I freeze these chimichangas?
- Absolutely! Freeze them assembled but uncooked, then cook straight from frozen, adding a few extra minutes to the cooking time.
- → What other fillings can I use?
- Try chicken, pork, beans, or even just cheese and vegetables. The sky's the limit with chimichanga fillings!
- → How do I know when the oil is hot enough?
- The oil should reach 350°F. If you don't have a thermometer, drop a small piece of tortilla in - it should sizzle immediately.