
 Save
Save
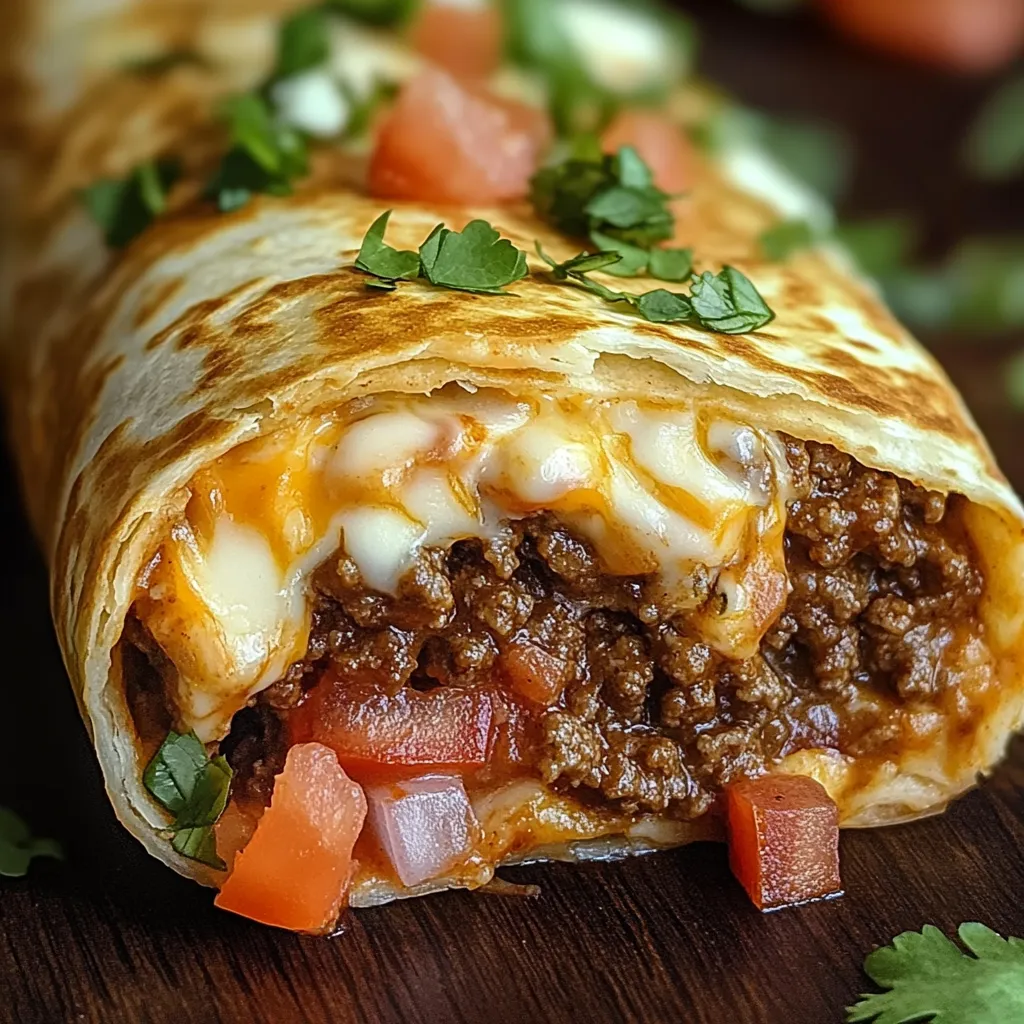
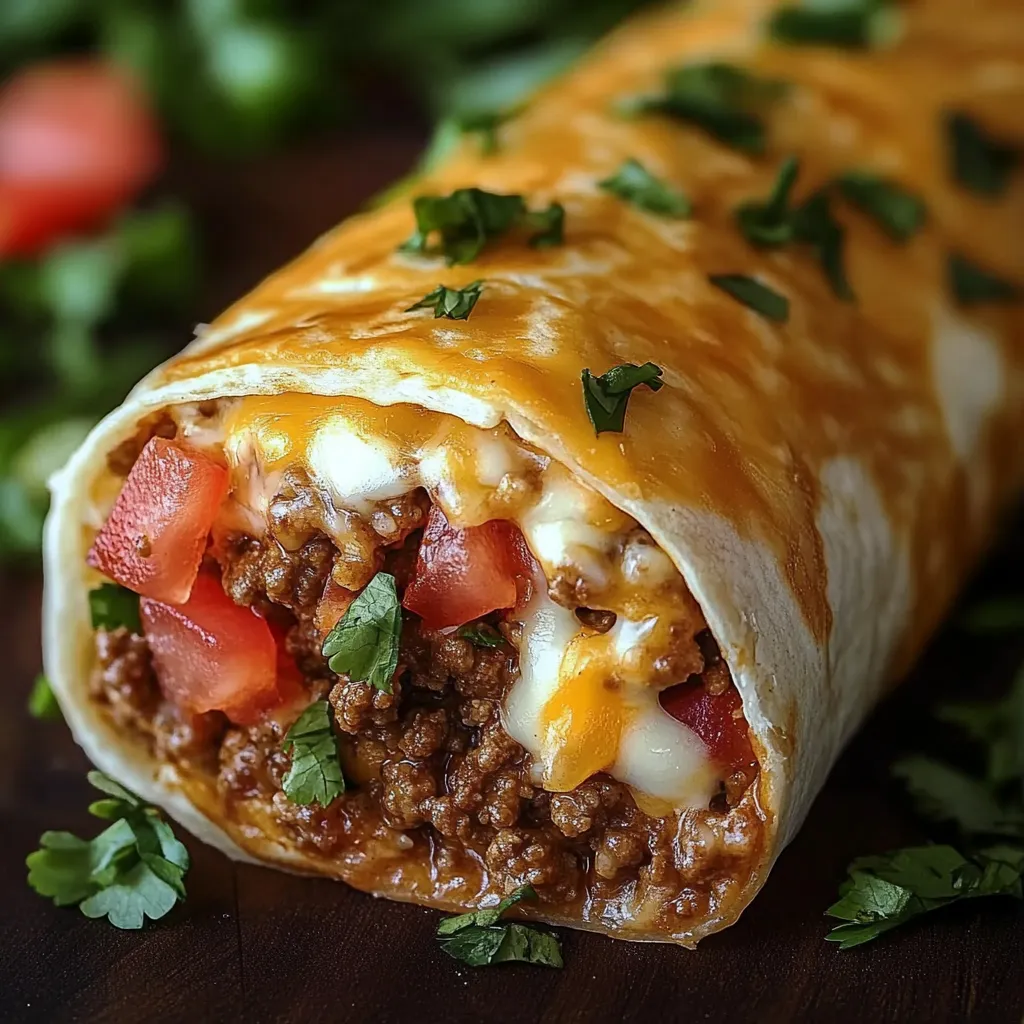
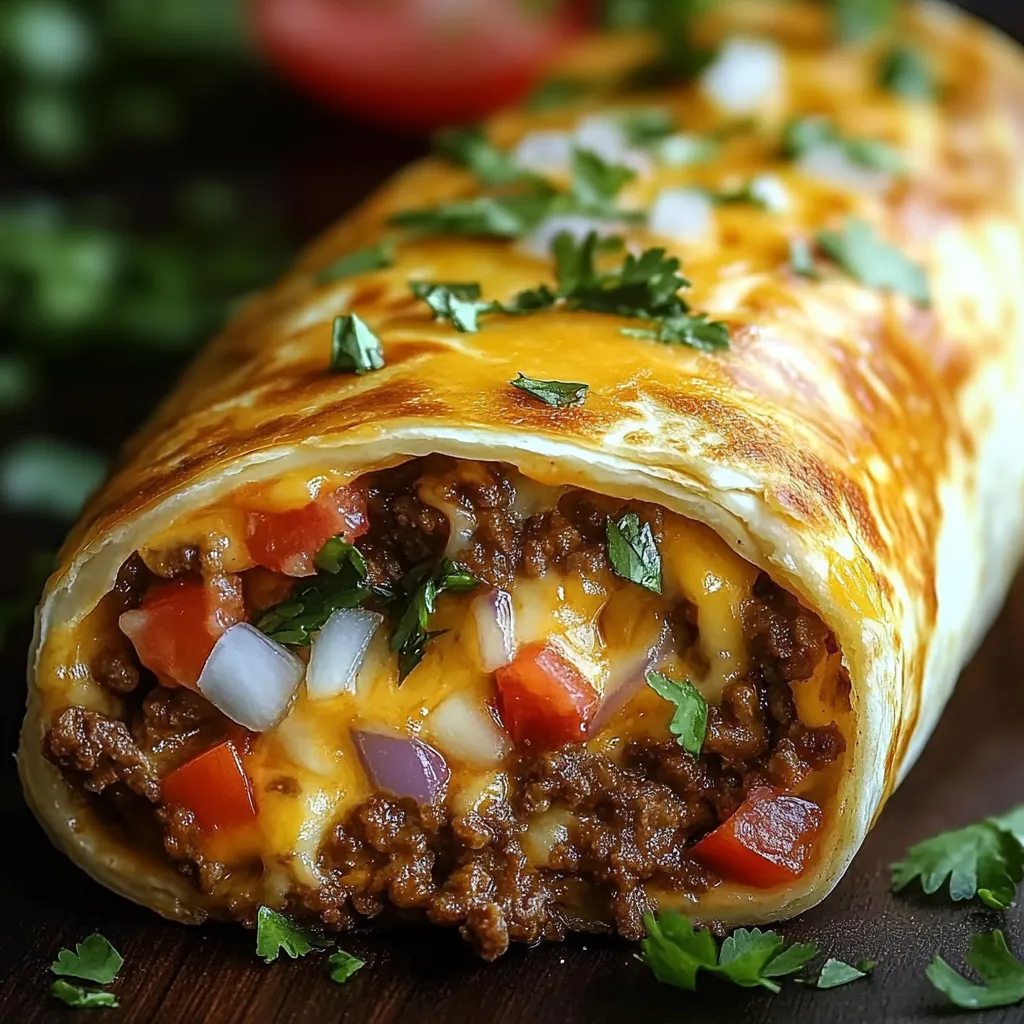
Crispy, golden-brown tortillas encase a mouthwatering filling of seasoned ground beef and molten cheese in this irresistible Tex-Mex creation. Each chimichanga delivers the perfect textural contrast between the crackling exterior and savory, cheese-laden interior that oozes with every bite. The distinctive combination of warming spices infuses the beef with complex flavor that develops further during cooking, while the dual cheese blend creates those impressive, Instagram-worthy cheese pulls that make this dish as visually appealing as it is delicious. These restaurant-quality chimichangas bring an elevated dining experience to your home kitchen with surprisingly straightforward preparation.
I first attempted making chimichangas after enjoying them at my favorite Mexican restaurant for years, doubting I could recreate that perfect crispiness at home. My first batch surprised even me with how closely they resembled restaurant quality, becoming an instant family favorite. My husband, who typically prefers plain meals, requested them three times the following week. The most satisfying moment came when my mother-in-law, who rarely compliments my cooking, asked for the recipe after her first bite. The way the cheese melts into the seasoned beef creates a harmonious filling that tastes even better than the restaurant version because of the freshness and ability to adjust seasonings exactly to our preference.
Flavor Foundation
- Ground beef: Select 80/20 meat for ideal fat content that delivers superior flavor and juiciness; leaner varieties can result in dry filling.
- Yellow onion: Provides essential aromatic base that sweetens during cooking, creating depth in the beef mixture.
- Fresh garlic: Contributes aromatic complexity that permeates the entire filling; mincing finely ensures even distribution.
- Ground cumin: This earthy, warming spice brings quintessential Mexican flavor that anchors the entire seasoning profile.
- Chili powder: Adds gentle heat and remarkable color while contributing multiple flavor dimensions from its blend of spices.
- Smoked paprika: Introduces subtle smoky notes that elevate the filling beyond ordinary ground beef preparations.
- Tomato sauce: Creates moisture and rich umami flavor while binding the filling components together perfectly.
- Cheddar cheese: Sharp varieties provide tanginess and deep flavor that stands up to the seasoned beef beautifully.
- Monterey Jack: Offers superior meltability with mild flavor that complements without overwhelming the spiced beef mixture.
- Flour tortillas: Burrito-sized varieties provide ample surface for proper folding and sealing; quality brands offer better flexibility.
- Vegetable oil: High smoke point makes it ideal for achieving the signature crispy exterior through proper frying technique.
Cooking Masterpiece
- Flavorful Foundation:
- Begin by heating a large, heavy-bottomed skillet over medium heat until properly hot. Add the ground beef, breaking it into small, even crumbles using a wooden spoon as it cooks. Allow the meat to develop a beautiful brown crust in spots, approximately 7-8 minutes, which creates essential flavor compounds. Drain excess fat if necessary, leaving just enough to sauté the aromatics. Add finely chopped onion and minced garlic to the browned beef, reducing heat slightly to prevent burning while cooking until onions become translucent and slightly golden around edges, about 5 minutes.
- Spice Integration:
- Measure cumin, chili powder, smoked paprika, salt, and freshly ground black pepper directly into the beef mixture, stirring continuously to coat every morsel with these aromatic spices. Allow this seasoned mixture to cook for an additional minute, which toasts the spices and releases their essential oils for maximum flavor development. The kitchen will fill with an intoxicating aroma that signals the transformation of simple ingredients into something extraordinary. Watch carefully during this stage to prevent spice burning, which could introduce bitterness.
- Sauce Development:
- Pour tomato sauce over the seasoned beef mixture, using your spoon to scrape any browned bits from the pan bottom into the sauce. These concentrated flavor particles enrich the entire filling with their complex taste. Reduce heat to medium-low and allow everything to simmer gently for 5 minutes, during which the sauce will thicken slightly while penetrating the meat with flavor. Stir occasionally to prevent sticking, noticing how the mixture becomes more cohesive as liquid reduces. Remove the skillet from heat once the sauce reaches ideal consistency – moist but not watery.
- Cheese Incorporation:
- Allow the beef mixture to cool slightly, about 3-5 minutes, before adding the shredded cheddar and Monterey Jack cheeses. This cooling period prevents the cheese from immediately melting and separating, ensuring proper incorporation throughout the filling. Gently fold the cheese into the warm beef mixture until evenly distributed, creating pockets of cheese that will melt beautifully inside each chimichanga. The residual heat should slightly soften the cheese without completely melting it, creating the perfect consistency for filling.
- Assembly Technique:
- Prepare a clean work surface and warm tortillas briefly in the microwave or on a dry skillet to increase their flexibility and prevent cracking during folding. Place approximately one-third cup of the beef and cheese mixture slightly below the center of each tortilla, shaping it into an oval parallel to your body. Fold the bottom edge over the filling, then fold in both sides tightly before rolling upward to complete the package. Ensure all edges are tucked in securely to prevent filling from escaping during frying. If necessary, secure with toothpicks, removing them before serving.
My grandmother taught me that the secret to perfectly crispy chimichangas lies in the tortilla preparation. She always warmed them between damp paper towels in the microwave for exactly 15 seconds, making them pliable without drying out. Following her wisdom, I've never experienced the frustration of cracked tortillas during rolling. I've also discovered through many batches that allowing the filled chimichangas to rest for 10 minutes before frying helps the tortillas adhere to themselves at the seams, preventing unwanted opening during cooking. When making these for my family, I often prepare double batches of the filling, freezing half for future quick meals that taste just as fresh with minimal effort.
Serving Suggestions
These golden chimichangas shine brightest when presented with thoughtful accompaniments that complement their rich flavors. Create a restaurant-style presentation by placing a freshly fried chimichanga diagonally across a warmed plate, accompanied by scoops of fluffy Mexican rice and creamy refried beans. Garnish with vibrant touches including diced tomatoes, shredded lettuce, and thinly sliced radishes for peppery crunch and visual appeal. Provide small ramekins of cooling sour cream, zesty guacamole, and fresh pico de gallo alongside, allowing diners to customize each bite according to personal preference. For family-style service, arrange multiple chimichangas on a large platter surrounded by colorful toppings and sides, creating an impressive centerpiece for casual gatherings.
Flavor Adjustments
This versatile recipe welcomes creative variations while maintaining its essential character and appeal. Transform the flavor profile completely by substituting seasoned shredded chicken mixed with cream cheese and green chilies for a lighter, creamier filling option. Create a breakfast version featuring scrambled eggs, crispy bacon bits, and hash browns inside the tortilla, topped with hollandaise or country gravy for morning indulgence. Vegetarian diners might appreciate a filling of seasoned black beans, roasted corn, peppers, and pepper jack cheese with similar spicing to the beef version. For those seeking extra heat, incorporate diced jalapeños or chipotle peppers in adobo sauce into the filling mixture, pairing with pepper jack cheese instead of Monterey Jack.
Storage Solutions
These magnificent chimichangas maintain their quality remarkably well when stored properly, making them excellent candidates for make-ahead meals. Allow any extras to cool completely before wrapping individually in aluminum foil, which helps preserve crispness better than plastic containers. Store wrapped chimichangas in the refrigerator for up to three days, where they'll maintain excellent flavor though the tortilla will soften somewhat. For longer storage, place foil-wrapped chimichangas in freezer bags, removing as much air as possible before sealing, and freeze for up to three months. Label with the date and contents for easy identification among your frozen treasures.
I've prepared these cheesy beef chimichangas countless times, from casual family dinners to larger gatherings, and they never fail to impress while bringing genuine joy to the table. What makes this recipe particularly special is how it transforms simple, accessible ingredients into something that feels celebratory and special without requiring advanced culinary skills. The contrast between the shatteringly crisp exterior and the molten, savory interior creates a textural experience that elevates the dish beyond ordinary Tex-Mex fare. Whether you're cooking for a weeknight family meal or weekend guests, these chimichangas strike the perfect balance between impressive presentation and comfortable, satisfying flavors that everyone appreciates.
Common Questions About Cooking
- → Can I bake these instead of frying?
- Yes! Brush the wrapped chimichangas with oil and bake at 400°F for 20-25 minutes until golden. They won't be quite as crispy as fried ones, but still delicious.
- → What meat can I use besides beef?
- Ground chicken, turkey, or pork work great. For a vegetarian version, try using black beans or pinto beans with the same seasonings.
- → How do I store leftover chimichangas?
- Keep them in an airtight container in the fridge for up to 3 days. For longer storage, wrap individually in foil and freeze for up to 3 months.
- → What's the best way to reheat them?
- For crispy results, reheat in the oven at 375°F for 15 minutes or in an air fryer at 350°F for 5-7 minutes. Microwaving works but the tortilla won't stay crispy.
- → Can I make these ahead of time?
- Yes! Prepare the filling and assemble the chimichangas a day ahead, then refrigerate. Fry them just before serving for the best texture.
- → What are good side dishes to serve with chimichangas?
- Mexican rice, refried beans, corn salsa, or a simple green salad pair perfectly. For drinks, try horchata or iced tea.