
 Save
Save
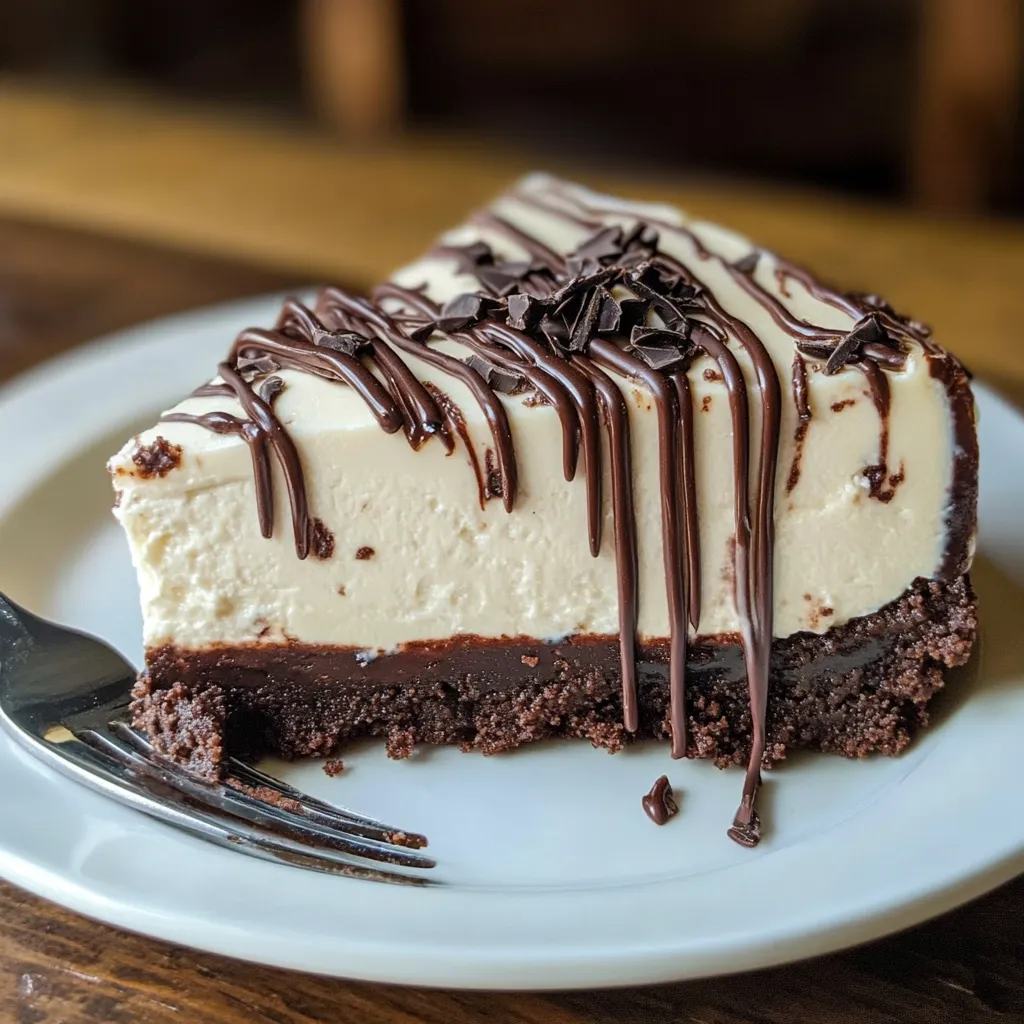
Velvety chocolate cheesecake layers meet fudgy brownie elements in this show-stopping dessert that requires zero oven time. Each slice reveals rich, creamy texture studded with brownie pieces that create delightful textural contrast throughout. The intense chocolate flavor satisfies the deepest cravings while the no-bake convenience makes this perfect for summer entertaining or busy schedules. This dessert bridges the gap between brownie lovers and cheesecake enthusiasts with spectacular results.
My obsession with this dessert began during an unusually hot summer when turning on the oven seemed impossible. Desperate for something sweet to bring to a dinner party, I experimented with combining my two favorite desserts into one no-bake creation. The result exceeded all expectations, becoming such a hit that friends now specifically request this dessert for special occasions. Even my brownie-obsessed cousin admits this surpasses traditional brownies.
Decadent Elements
- Cream cheese: Creates luxurious foundation with tangy notes that balance chocolate intensity
- Powdered sugar: Sweetens smoothly without graininess for perfect texture throughout
- Heavy cream: Adds lightness and creates that signature cheesecake richness when whipped
- Cocoa powder: Provides deep chocolate flavor without overwhelming sweetness
- Brownie mix: Forms the flavor backbone while adding authentic brownie taste easily
- Butter: Binds the crust ingredients while adding richness to the base
- Brownie pieces: Create textural interest and intensify the brownie experience
- Chocolate chips: Optional but provide delightful bursts of pure chocolate throughout
- Chocolate wafer cookies: Alternative crust option for extra chocolate intensity
Simple Assembly
- Foundation Creation:
- Combine finely crushed brownie pieces with melted butter until mixture holds together when pressed, creating an even layer across your springform pan bottom.
- Crust Setting:
- Press the brownie mixture firmly using the back of a measuring cup or glass bottom, ensuring even thickness throughout before refrigerating until firm.
- Cream Cheese Preparation:
- Beat softened cream cheese with electric mixer until completely smooth and fluffy, ensuring no lumps remain for perfect final texture.
- Flavor Development:
- Gradually add powdered sugar, cocoa powder, and dry brownie mix to the cream cheese, beating thoroughly until mixture becomes uniform and rich brown color.
- Whipped Cream Addition:
- Whip heavy cream separately until stiff peaks form, then gently fold into chocolate mixture using rubber spatula to maintain airiness.
- Careful Folding:
- Take time with folding process to preserve light texture while ensuring complete incorporation of whipped cream throughout the chocolate base.
- Layer Assembly:
- Spread cheesecake filling evenly over chilled crust, smoothing top with offset spatula for professional appearance and even distribution.
- Final Touches:
- Sprinkle crushed brownie pieces and chocolate chips across surface if desired, pressing lightly to ensure adherence without sinking.
- Essential Chilling:
- Refrigerate assembled cheesecake for minimum four hours or overnight, allowing flavors to meld while achieving proper slicing consistency.
The secret to exceptional no-bake cheesecake lies in achieving perfect temperature balance during assembly. I learned from a pastry chef friend that slightly warm cream cheese spreads more easily while cold whipped cream maintains stability better. This temperature contrast creates the ideal environment for smooth incorporation without deflating the whipped cream that provides essential lightness.
Creative Transformations
This versatile dessert welcomes countless creative adaptations that personalize the experience. Swirl peanut butter through the filling for Reese's-inspired flavors that complement chocolate beautifully. Add crushed cookies between layers for extra textural complexity. Mint extract transforms this into an elegant after-dinner dessert reminiscent of premium restaurants. Orange zest creates sophisticated citrus-chocolate combinations that surprise and delight sophisticated palates.
Presentation Perfection
Transform this dessert from homemade to professional-looking with thoughtful presentation techniques. Create chocolate curl garnishes using room temperature chocolate and a vegetable peeler for elegant topping. Dust with cocoa powder just before serving for sophisticated finish. Use parchment paper sling in the pan for easier removal and cleaner slice edges. Individual ramekin portions create elegant plated desserts for dinner parties.
Flavor Enhancements
Elevate basic recipe with simple additions that create gourmet experiences. High-quality vanilla extract adds depth that complements chocolate without competing. Instant coffee powder dissolved in small amount of cream intensifies chocolate flavors dramatically. A pinch of sea salt scattered on top before chilling creates sophisticated sweet-salty balance. Consider adding liqueurs like Kahlua or Bailey's for adult versions of this dessert.
Storage Solutions
Proper storage maintains quality and extends enjoyment throughout the week. Cover surface directly with plastic wrap before adding lid to prevent skin formation. Store in main refrigerator section for consistent temperature rather than door areas. For freezing, wrap individual slices in plastic wrap then foil for portion control. Label with dates for rotation management especially when making multiple desserts ahead.
Serving Success
Achieve perfect slices with specific techniques that ensure clean presentation. Use sharp knife dipped in warm water and wiped clean between cuts for smooth edges. Allow cheesecake to sit at room temperature for ten minutes before slicing for easier cutting. Run knife around pan edges before removing springform sides. Garnish plates with powdered sugar dusting or chocolate drizzle for restaurant-quality presentation.
Temperature Management
Understanding temperature requirements ensures consistent results every time. Cream cheese should feel soft but not warm when properly tempered. Whipped cream needs cold bowl and beaters for best volume development. Chill assembled cheesecake uncovered initially to prevent condensation, then cover once surface sets. Room temperature serving provides optimal texture between chilled firmness and creamy richness.
This incredible dessert represents everything wonderful about creative cooking - taking beloved favorites and reimagining them into something even better. The no-bake convenience doesn't sacrifice any richness or complexity, proving that exceptional desserts don't always require complicated techniques. What I find most rewarding is watching people's reactions to their first bite - that moment when they realize this combines the best of both worlds without compromise. The beauty lies in its simplicity disguised as sophistication, making it accessible to novice bakers while still impressing experienced dessert enthusiasts.
Common Questions About Cooking
- → Why do I need to heat-treat the flour?
- Raw flour can contain harmful bacteria, so heat-treating it by microwaving for 1 minute or baking at 350°F for 5 minutes makes it safe to eat in no-bake recipes.
- → Can I use a different crust?
- Absolutely! Try graham crackers, chocolate wafers, or even brownie crumbs. You can also skip the crust entirely for a lighter dessert served in individual cups.
- → How long does this cheesecake need to set?
- At least 4 hours, but overnight is even better. The longer it chills, the firmer it gets and the more the flavors develop.
- → Can I make this without a springform pan?
- Yes! Use a regular 9-inch pie pan lined with parchment paper, or make individual portions in mason jars or glasses for a cute presentation.
- → How do I get clean slices?
- Run your knife under warm water and wipe it clean between each cut. This prevents the creamy filling from sticking to the blade.
- → Can I freeze this cheesecake?
- Yes! Wrap individual slices in plastic wrap and freeze for up to 3 months. Thaw in the refrigerator for a few hours before serving.