
 Save
Save
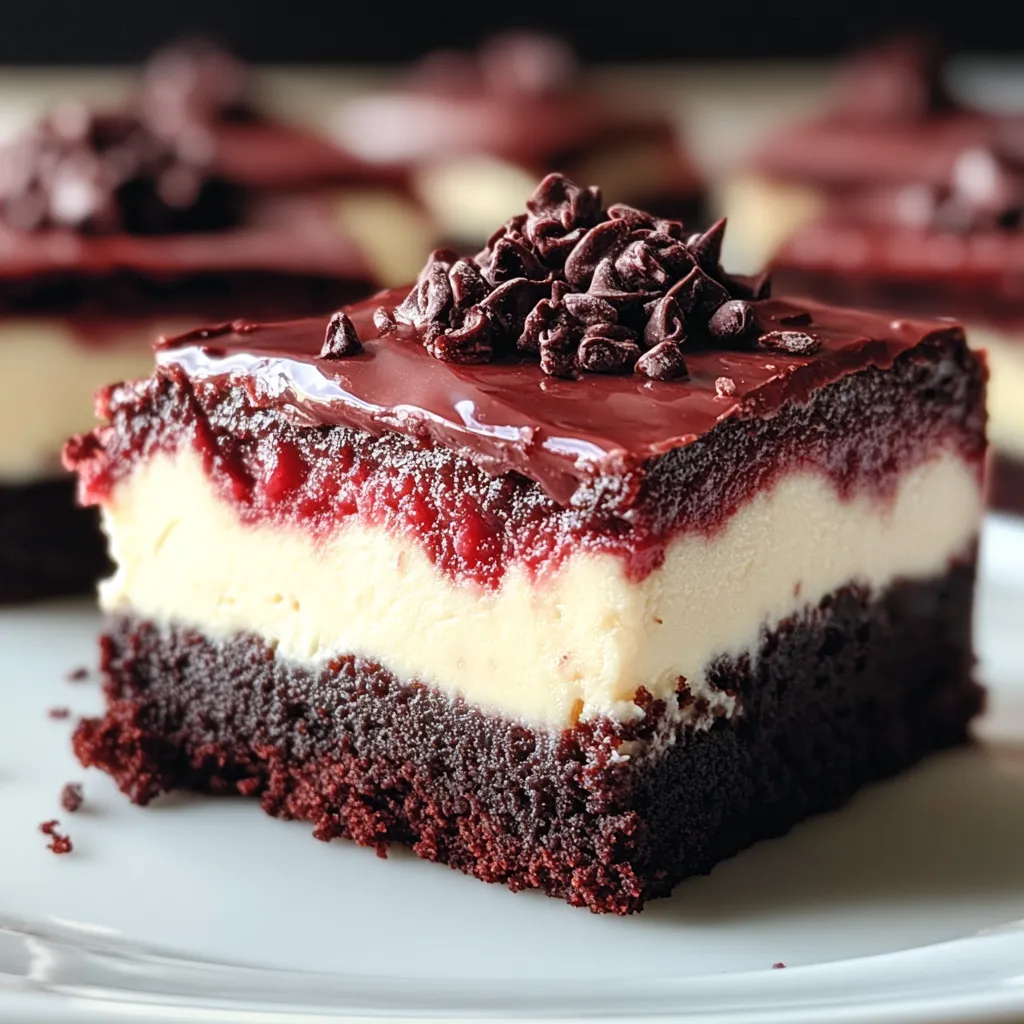
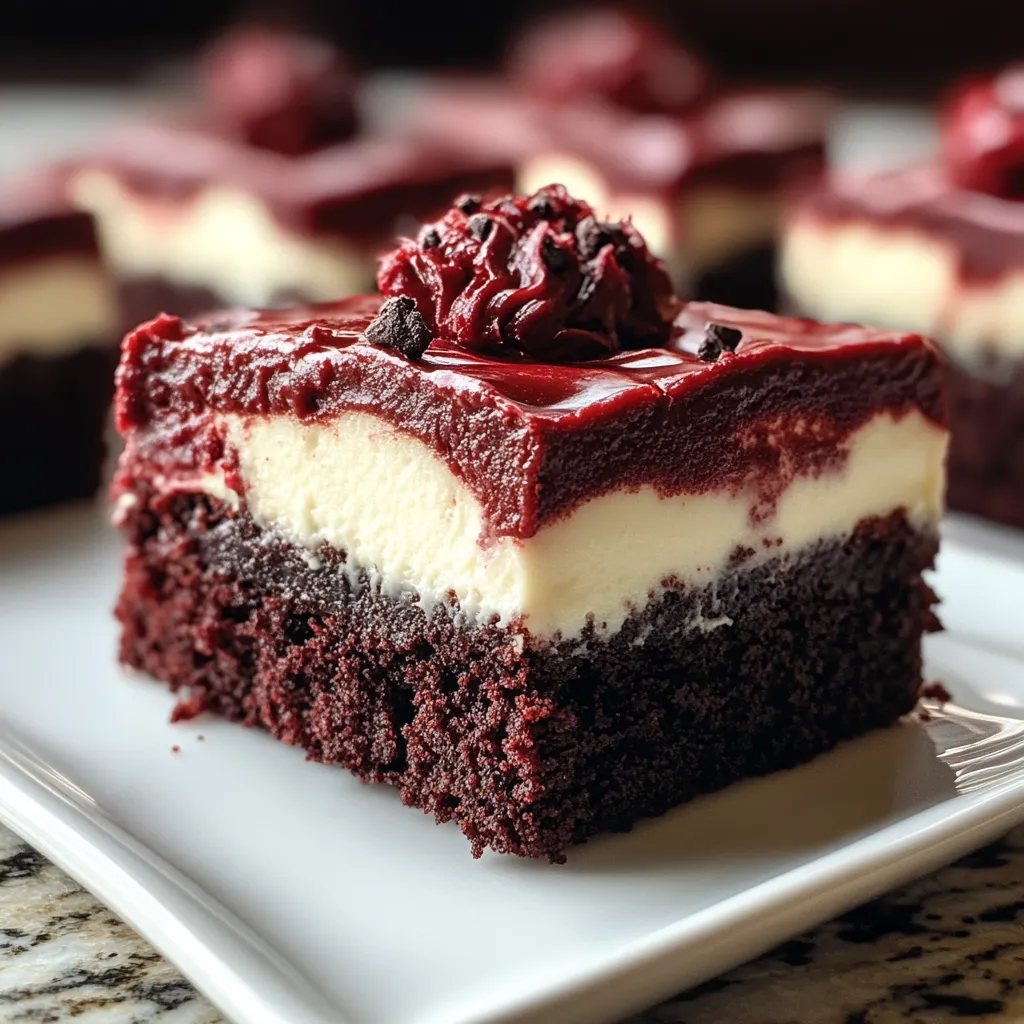
Vibrant crimson mingles with creamy ivory in these extraordinary layered confections. These remarkable brownies combine fudgy chocolate-infused base with tangy cheesecake swirls, creating perfect harmony in every decadent bite. The striking visual contrast between deep red velvet and pristine cheesecake creates dramatic presentation without complicated techniques. Each square delivers perfect textural balance—dense, moist brownie foundation supporting silky cheesecake ribbons throughout.
The inspiration for these brownies struck during holiday preparations when standard chocolate desserts seemed somehow insufficient for the festive occasion. The resulting creation proved so remarkably successful that guests immediately requested the recipe before leaving. My typically reserved sister-in-law, who rarely indulges in sweets, consumed two full squares while declaring them "absolutely worth the calories." Something about the combination of familiar flavors in unexpected presentation creates an almost magical dessert experience that pleases sophisticated palates while maintaining universal appeal.
Perfect Ingredients
- Unsalted butter: Creates rich foundation with controlled salt level. Melting rather than creaming develops fudgy texture rather than cakey result.
- Granulated sugar: Provides essential sweetness and structure throughout. Fine varieties dissolve more readily during mixing process.
- Large eggs: Contribute binding structure and moisture to brownie base. Room temperature eggs incorporate more thoroughly than cold.
- Pure vanilla extract: Enhances chocolate notes with warm aromatic complement. Real extract delivers significantly better flavor than artificial alternatives.
- Red food coloring: Creates signature vibrant appearance without affecting flavor. Gel varieties offer superior intensity compared to liquid options.
- Natural cocoa powder: Delivers authentic chocolate flavor with slight acidity. Dutch-processed varieties work acceptably though provide less pronounced red coloration.
- All-purpose flour: Provides structural integrity with moderate protein content. Measuring by weight rather than volume ensures consistent results.
- Fine sea salt: Enhances flavor complexity throughout both layers. The tiny crystals distribute more evenly than coarser varieties.
- White vinegar: Brightens red color while enhancing slight tanginess. Just a small amount creates noticeable improvement without detectable vinegar flavor.
- Cream cheese: Forms silky cheesecake layer with distinctive tang. Full-fat varieties produce superior texture and flavor compared to reduced-fat alternatives.
Baking Method
Brownie Foundation
Begin by melting butter completely before incorporating sugar, creating liquid foundation that develops fudgy texture rather than cakey result. Add eggs individually, mixing thoroughly between additions to create proper emulsion. Incorporate vanilla and red food coloring gradually until achieving vibrant red shade slightly darker than desired finished color, as baking naturally lightens the hue. Combine dry ingredients separately before adding to wet mixture, mixing just until incorporated to prevent toughening through gluten development.
Cheesecake Perfection
Create silky cheesecake mixture by ensuring cream cheese reaches complete room temperature before beginning, which prevents unwanted lumps in finished swirl. Beat thoroughly before adding sugar, which allows proper incorporation without excessive air that might cause cracking. Add egg and vanilla after sugar fully incorporates, mixing just until smooth rather than whipping extensively. The ideal consistency spreads easily while maintaining sufficient body to create distinct swirls when combined with brownie batter.
Strategic Assembly
Reserve small portion of brownie batter before transferring remainder to prepared pan, spreading into even layer that reaches corners without excessive compaction. Pour cheesecake mixture carefully over brownie base, using offset spatula to create even distribution without disturbing underlying layer. Add remaining brownie batter in small dollops across surface, then create distinctive swirl pattern using knife or skewer drawn through both components. The minimal swirling creates beautiful marbling while maintaining distinct color separation.
Temperature Management
Bake in properly preheated oven at moderate temperature, which allows even cooking without excessive exterior browning before interior sets properly. Position rack centrally for balanced heat distribution throughout baking period. Verify doneness through toothpick test, looking for moist crumbs rather than completely clean insertion, which indicates perfect fudgy texture without underbaking. Cool completely in pan before attempting removal, as structure strengthens significantly during cooling process.
Perfect Cutting
Achieve professional-looking squares by chilling completely firmed brownies before cutting with sharp knife wiped clean between slices. For absolutely pristine edges, freeze briefly before cutting, which prevents crumbling or smearing between distinct layers. Allow cut brownies to return to room temperature before serving for ideal texture and flavor experience, as excessive coldness diminishes chocolate notes and cheesecake tang.
My first attempt at these brownies taught valuable lessons about proper swirling technique and baking time. When I initially created too many swirls, the distinct color separation disappeared despite good flavor. Now I limit knife passes through the batter to create more dramatic visual contrast. Similarly, I discovered the importance of proper doneness assessment—when I once relied solely on baking time without verification, the center remained underbaked while edges overcooked. Using visual cues alongside toothpick testing now ensures perfect consistency throughout the entire pan.
Serving Suggestions
Elevate your brownie presentation by dusting with cocoa powder through paper doily for elegant pattern across the surface. Consider garnishing with fresh raspberries or strawberries for complementary color and flavor enhancement. For special occasions, serve slightly warmed with small scoop of vanilla bean ice cream alongside for temperature and texture contrast. Coffee enthusiasts appreciate how medium-roast coffee complements both chocolate and cheesecake flavors beautifully. During holiday gatherings, arrange on tiered stand with complementary desserts for impressive dessert table centerpiece.
Creative Variations
Transform these brownies by incorporating white chocolate chips into brownie batter for sweet creaminess that complements tangy cheesecake. Create chocolate-enhanced cheesecake layer by adding two tablespoons cocoa powder to cream cheese mixture for dramatic flavor contrast. Experiment with adding orange zest to either component for bright citrus notes that complement chocolate beautifully. Consider topping with chocolate ganache layer after cooling for triple-layered indulgence. For special occasions, incorporate crushed peppermint candies into cheesecake swirl during winter holidays or freeze-dried strawberry powder for natural pink coloration during spring celebrations.
Storage Solutions
Maintain optimal texture by storing room-temperature brownies in airtight container with parchment between layers to prevent sticking. Refrigerate during warmer weather to preserve cheesecake freshness, though cover tightly to prevent absorption of refrigerator odors. For extended storage, freeze individually wrapped squares for up to two months, thawing in refrigerator overnight before bringing to room temperature for serving. If making ahead for special event, prepare up to three days in advance, keeping refrigerated until approximately thirty minutes before presentation for ideal serving consistency.

The journey to perfect red velvet cheesecake brownies taught valuable lessons about ingredient temperature and visual assessment. When I began ensuring all components reached proper room temperature rather than rushing preparation with partially softened cream cheese, the cheesecake layer became significantly smoother with fewer lumps. Similarly, discovering that slight underbaking based on traditional browning cues created remarkably better fudgy texture after cooling. These thoughtful adjustments transformed good brownies into consistently exceptional treats worthy of celebration and special occasions.
Common Questions About Cooking
- → Can I use a boxed red velvet cake mix instead?
- Yes! For a shortcut, use a boxed red velvet cake mix prepared according to package directions (but use only half the water called for to get a brownie consistency). Then add the cheesecake layer as directed in this recipe.
- → My cheesecake layer sank into the red velvet layer. What went wrong?
- This usually happens if the red velvet batter is too thin. Make sure you're measuring your flour correctly and not overmixing. Also, letting the red velvet layer bake for 5 minutes before adding the cheesecake layer can help prevent sinking.
- → Can I leave out the red food coloring?
- Yes, you can omit the red food coloring for regular chocolate cheesecake brownies. The taste will be the same, you'll just miss the red velvet visual effect. If you want color without artificial dyes, try using 2 tablespoons of beet powder instead.
- → How do I know when the brownies are done baking?
- The edges should be set and slightly pulling away from the sides of the pan, while the center still looks slightly soft but not wet. A toothpick inserted in the center should come out with a few moist crumbs, not wet batter. Don't overbake or they'll be dry.
- → Can I freeze these brownies?
- Absolutely! Let them cool completely, then wrap the whole slab (uncut) or individual brownies tightly in plastic wrap and then aluminum foil. Freeze for up to 3 months. Thaw overnight in the refrigerator before serving.