
 Save
Save
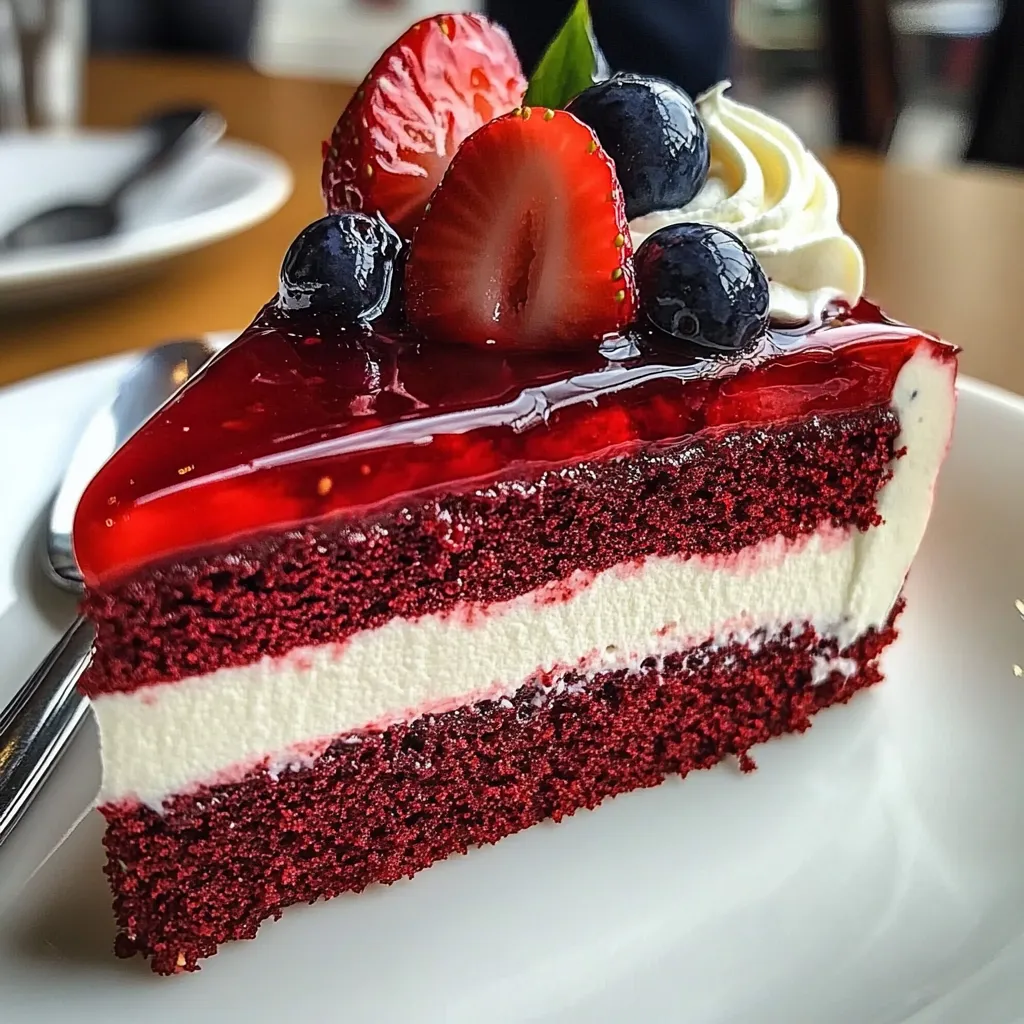
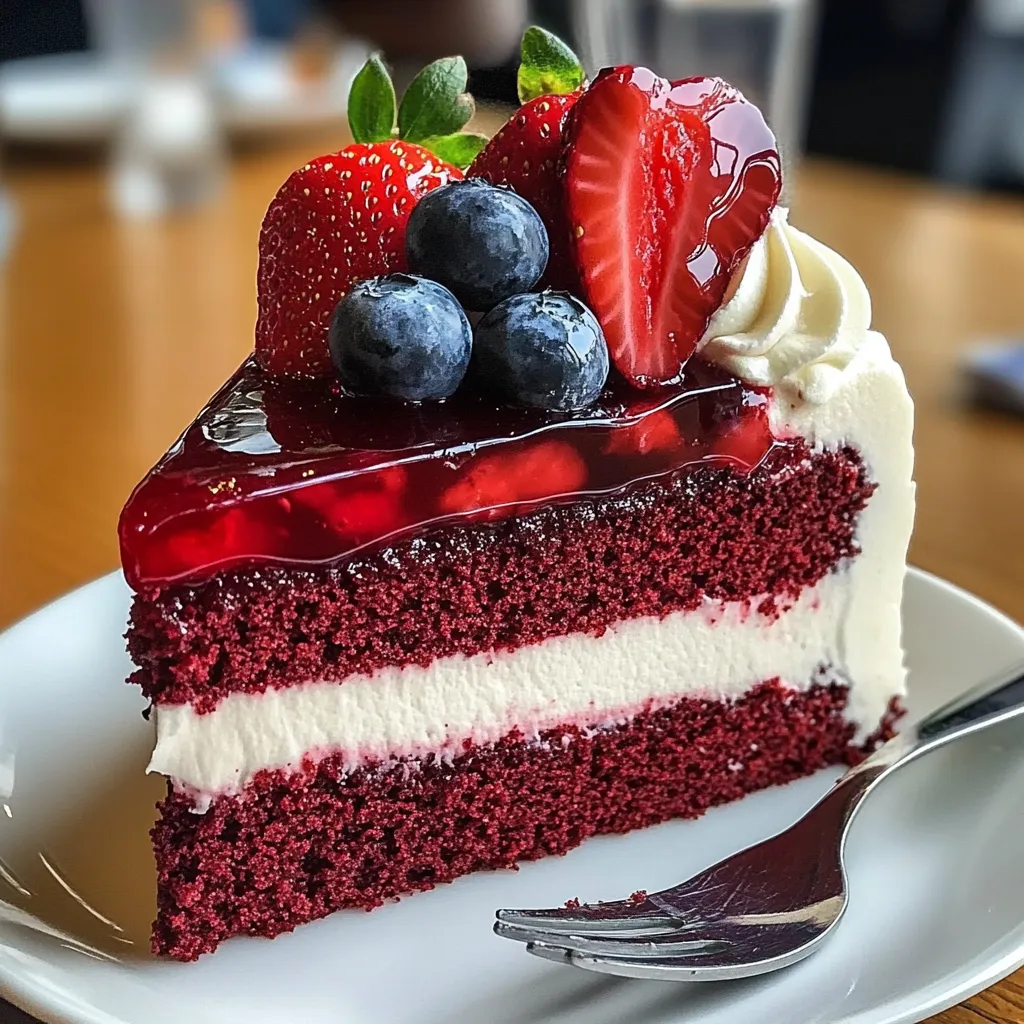
Two indulgent desserts merge into one showstopping creation as velvety red cake provides the foundation for creamy cheesecake, crowned with glistening fresh strawberries. This red velvet strawberry cheesecake combines rich cocoa undertones and tangy cream cheese in perfect harmony, creating a dessert that's as beautiful to look at as it is delicious to eat. The striking color contrast between deep red cake, ivory cheesecake, and ruby strawberries makes this a visually stunning centerpiece for any celebration.
I first created this showstopper for my sister's birthday after she mentioned loving both red velvet cake and cheesecake. Rather than choosing between them, I decided to combine her favorites into one spectacular dessert. The look on her face when I brought it to the table was priceless! Since then, it's become my signature dessert for special celebrations. What makes it truly special is how the subtle cocoa flavor in the red velvet layer complements the tangy cheesecake, while the fresh strawberries cut through the richness. Even friends who consider themselves dessert connoisseurs have requested the recipe after their first bite.
Perfect Dessert Components
- Red Velvet Cake: Forms the distinctive foundation with its subtle cocoa flavor—the small amount of vinegar reacts with baking soda to enhance the vibrant red color
- Cream Cheese Layer: Creates luxurious creaminess and tangy contrast—using room temperature cream cheese ensures a perfectly smooth texture without lumps
- Fresh Strawberries: Add brightness and natural sweetness—selecting ripe, in-season berries makes a significant difference in flavor
- Buttermilk: Contributes essential tenderness to the cake layer—its acidity works with baking soda to create a soft, velvet-like texture
- Quality Vanilla Extract: Enhances both layers with aromatic warmth—pure extract rather than imitation provides superior flavor
- Red Food Coloring: Delivers the signature vibrant color—gel coloring offers intense hue with less liquid than traditional food coloring
Impressive Yet Achievable
- Begin With The Base
- Preheat your oven to 325°F and prepare a 9-inch springform pan by greasing it and lining the bottom with parchment paper. The parchment creates easy release while the springform design allows for beautiful presentation later.
- Create The Velvety Foundation
- In a medium bowl, whisk together one and a half cups all-purpose flour, one cup granulated sugar, one teaspoon baking powder, half teaspoon baking soda, quarter teaspoon salt, and one tablespoon cocoa powder until well combined. In a separate bowl, beat one large egg, half cup vegetable oil, half cup buttermilk, one tablespoon red food coloring, one teaspoon vanilla extract, and half teaspoon white vinegar until smooth. Gradually add the dry ingredients to the wet mixture, stirring until just combined.
- Bake The Red Layer
- Pour the red velvet batter into the prepared springform pan, smoothing the top with a spatula for an even layer. Bake for 20-25 minutes until a toothpick inserted in the center comes out clean. Allow it to cool completely in the pan, which forms the perfect base for the cheesecake layer. The cake will rise slightly but remain dense enough to support the cheesecake.
- Prepare The Creamy Layer
- In a large mixing bowl, beat two cups of softened cream cheese until perfectly smooth. Add one cup sour cream, one cup powdered sugar, and one teaspoon vanilla extract, beating until fully incorporated and silky. Add two large eggs one at a time, beating well after each addition. Finally, mix in one tablespoon of flour, which helps stabilize the cheesecake and prevent cracking.
- Combine The Layers
- Once the red velvet cake has cooled completely, pour the cheesecake batter over it, creating an even layer with a smooth top. The contrasting layers will remain distinct during baking, creating a beautiful effect when sliced.
- Perfect The Bake
- Bake the assembled cheesecake at 325°F for 50-60 minutes until the edges are set but the center still has a slight wobble. Turn off the oven and leave the door slightly ajar, allowing the cheesecake to cool gradually for one hour. This slow cooling helps prevent the surface from cracking. After this resting period, refrigerate for at least four hours or preferably overnight.
- Crown With Strawberries
- Shortly before serving, prepare the topping by slicing one cup of fresh strawberries and macerating them with two tablespoons of sugar if desired. This draws out their juices and enhances their natural sweetness. Arrange the strawberries on top of the chilled cheesecake, creating a beautiful finish that complements both the flavor and appearance.
- Serve With Style
- Carefully remove the sides of the springform pan to reveal the beautiful layers. For the cleanest slices, dip a sharp knife in hot water and wipe it clean between cuts. Serve chilled for the best texture and flavor experience.
I discovered the perfect balance for this recipe through several iterations. My first attempt had too much cocoa powder, which overpowered the delicate cheesecake flavor. Another version didn't have enough structure in the cake layer to support the cheesecake. The breakthrough came when I reduced the cocoa to just a tablespoon and adjusted the leavening agents to create a sturdy yet tender base. What makes this dessert special is how each component maintains its distinct character while complementing the others. The subtle cocoa notes in the red velvet layer enhance the tangy cheesecake without competing, while the fresh strawberries provide brightness that balances the richness perfectly.
Special Occasion Serving
Transform this stunning dessert into the highlight of your celebration with thoughtful presentation and accompaniments. Serve slices on white plates to showcase the dramatic color contrast between the ruby-red cake, ivory cheesecake, and bright strawberries. For formal occasions, garnish each plate with a mint leaf and a light dusting of powdered sugar for a professional touch. Create a dessert table centerpiece by elevating the cheesecake on a cake stand surrounded by additional fresh strawberries and edible flowers. Offer a small pitcher of slightly warmed high-quality dark chocolate sauce on the side for guests to drizzle as desired, adding another dimension of indulgence.
Creative Variations
Adapt this showstopping dessert to different seasons and preferences while maintaining its dramatic presentation. Chocolate ganache version adds a layer of rich chocolate ganache between the red velvet base and cheesecake layer, creating a triple-decker effect for serious chocolate lovers. White chocolate enhancement incorporates melted white chocolate into the cheesecake batter and uses white chocolate-dipped strawberries as garnish for an extra touch of elegance. Mixed berry delight replaces the strawberry topping with an assortment of raspberries, blackberries, and blueberries for a more complex fruit flavor and even more vibrant appearance. Holiday adaptation uses mint extract in the cheesecake layer and arranges the strawberries in a wreath pattern with mint leaves for a festive Christmas dessert.
Make-Ahead Magic
Plan efficiently with preparation techniques that ensure perfect results while reducing day-of stress. Prepare the entire cheesecake up to three days ahead and store covered in the refrigerator—the flavors actually improve with time as they meld together. For longer storage, freeze the fully baked and cooled cheesecake without the strawberry topping for up to one month. Wrap first in plastic wrap, then in aluminum foil, and place in a freezer bag to prevent freezer burn. Thaw overnight in the refrigerator before topping with fresh strawberries. For the freshest presentation, prep all components separately—bake and refrigerate the cheesecake, then slice the strawberries and macerate them shortly before serving. This ensures the berries remain vibrant rather than softening and bleeding color into the cheesecake.
This red velvet strawberry cheesecake combines two beloved desserts into something truly extraordinary. What makes it special isn't just the dramatic appearance or the combination of flavors, but the way it brings people together. There's something magical about slicing into those beautiful layers that never fails to elicit gasps of delight from guests. Even though it looks complex, the techniques are straightforward enough for anyone with basic baking experience to master. Whether you're celebrating a birthday, anniversary, or simply wanting to create a memorable dessert experience, this showstopper delivers both visual impact and incredible flavor in every slice.
Common Questions About Cooking
- → Can I make this cheesecake in advance?
- Absolutely! This cheesecake actually benefits from being made a day ahead. The cheesecake layer needs at least 4 hours to chill and set properly, but overnight chilling produces the best texture and flavor. Just add the fresh strawberry topping right before serving.
- → Why did my cheesecake crack on top?
- Cheesecakes can crack for several reasons: overmixing (which incorporates too much air), baking at too high a temperature, or cooling too quickly. To prevent cracks, always mix on low speed, use a water bath if possible, and cool gradually as directed in the recipe by leaving it in the turned-off oven with the door ajar.
- → Can I freeze this cheesecake?
- Yes, you can freeze this cheesecake without the strawberry topping for up to 1 month. Wrap it tightly in plastic wrap and then in aluminum foil. Thaw overnight in the refrigerator and add fresh strawberry topping just before serving.
- → What can I substitute for buttermilk?
- If you don't have buttermilk, you can make a substitute by adding 1/2 tablespoon of white vinegar or lemon juice to 1/2 cup of milk. Let it sit for 5-10 minutes until it slightly curdles, then use as directed in the recipe.
- → How do I know when the cheesecake is done baking?
- A properly baked cheesecake should be set around the edges but still have a slight wobble in the center when gently shaken. It will continue to set as it cools. If you're uncertain, an instant-read thermometer inserted into the center should read 150°F (65°C).
- → Can I make this without food coloring?
- Yes, you can make this without red food coloring. The cake layer won't have the signature red color but will still have the same delicious flavor. Alternatively, you can use natural food coloring like beet powder or reduced beet juice for a natural red hue.