
 Save
Save
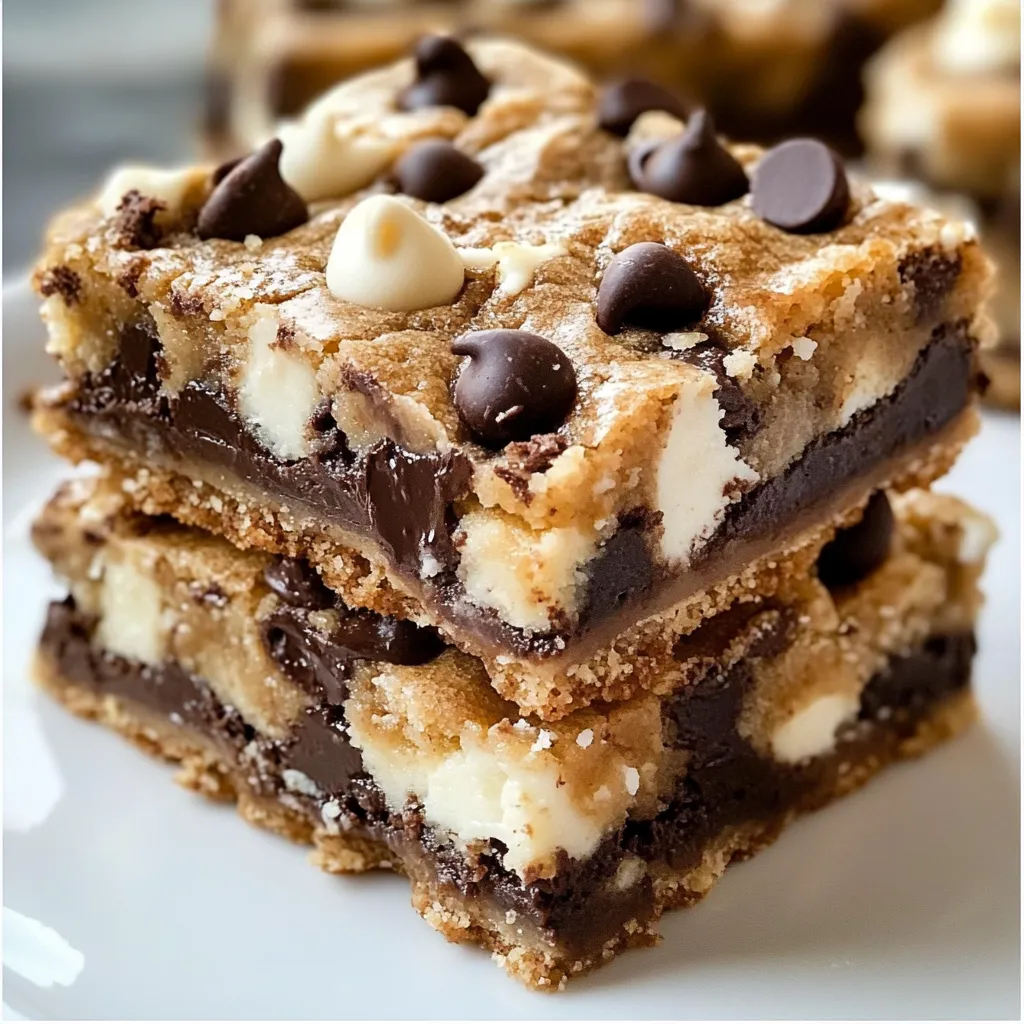
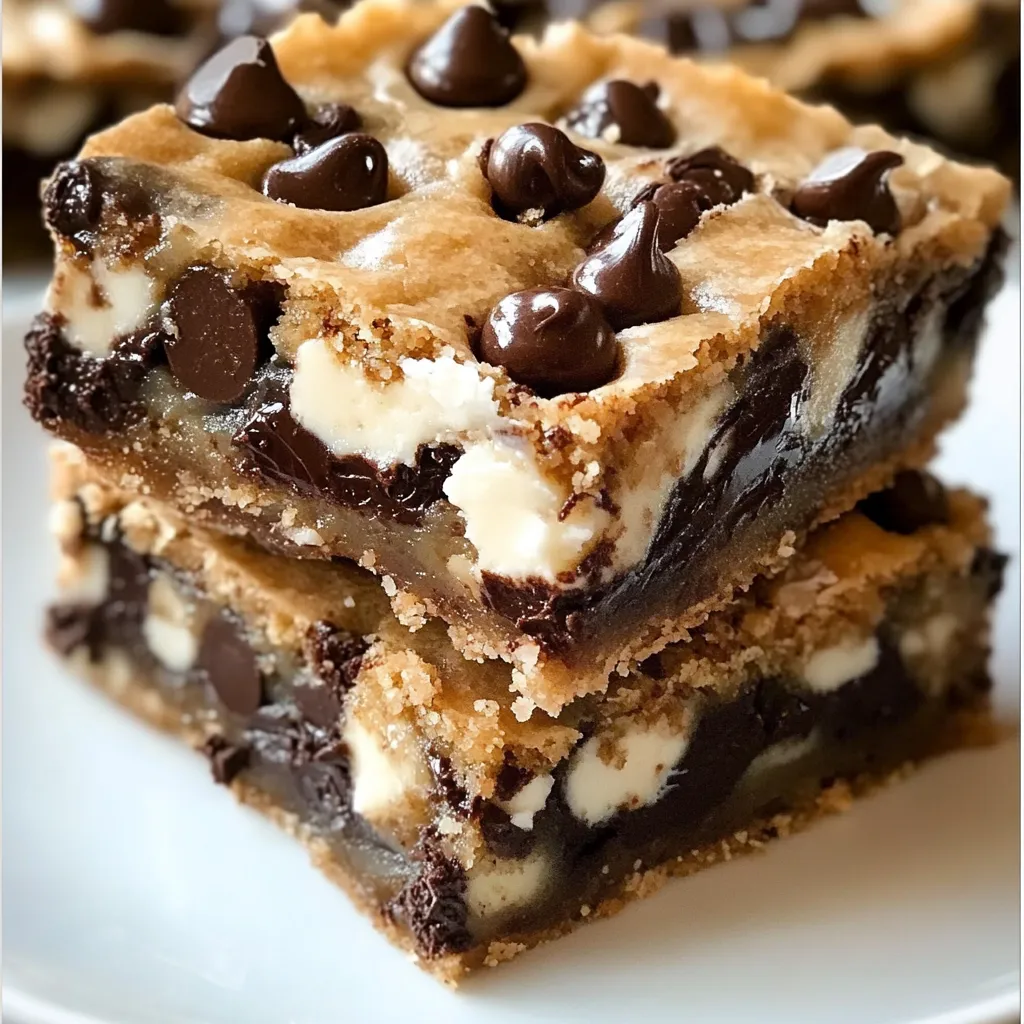
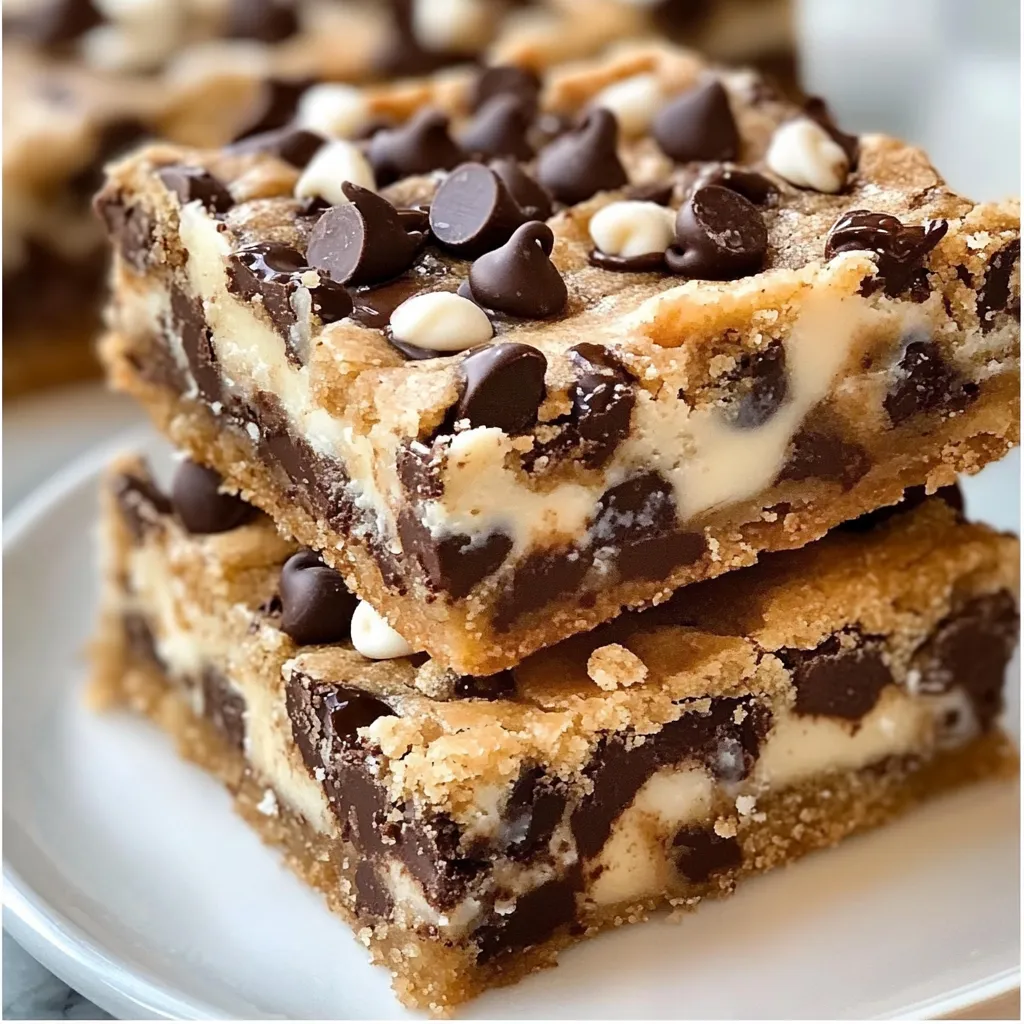
Magic cookie bars transform simple pantry ingredients into an irresistible layered dessert that lives up to its enchanting name. The buttery graham cracker base provides the perfect foundation for silky sweetened condensed milk that caramelizes slightly during baking while binding together a treasure trove of toppings. Each square delivers multiple dimensions of texture and flavor—from the crunchy nuts and chewy coconut to the melty chocolate chips—creating a magical symphony of sweetness in every perfectly balanced bite.
I first encountered these bars at my aunt's holiday cookie exchange where they consistently disappeared faster than any elaborate cookie on the table. After requesting the recipe, I was shocked by its simplicity—proof that sometimes the most beloved treats don't require complicated techniques or rare ingredients. Now these bars are my secret weapon for last-minute entertaining, delivering impressive results despite minimal preparation time.
Perfect Ingredients
- Graham Cracker Crumbs: Create the distinctive cookie-like base with subtle honey notes. Freshly crushed crackers provide superior texture and flavor compared to pre-packaged crumbs.
- Butter: Binds the crust together while adding rich flavor. Using melted butter ensures even distribution throughout the crumbs for perfect cohesion.
- Eagle Brand Sweetened Condensed Milk: Forms the magical binding layer that transforms during baking. Its slow caramelization creates the signature flavor and chewy texture that defines these bars.
- Chocolate Chips: Provide pockets of melty richness throughout each bar. Semi-sweet varieties offer the perfect balance against the very sweet condensed milk.
- Coconut: Contributes chewy texture and tropical sweetness. The flakes toast beautifully during baking, developing nutty flavor notes that enhance the entire bar.
- Chopped Nuts: Deliver essential crunch and depth of flavor. Walnuts provide classic taste, though pecans offer buttery richness that pairs beautifully with the other ingredients.
Bar Brilliance
- Proper Preparation:
- Begin by preheating your oven to the correct temperature—350°F for metal pans or 325°F for glass baking dishes. This temperature adjustment prevents overbrowning in glass dishes, which conduct heat differently than metal ones. Line your 9×13-inch pan with parchment paper or aluminum foil with overhang on two sides for easy removal after cooling.
- Crust Construction:
- Combine graham cracker crumbs with melted butter, stirring until every crumb is moistened and the mixture resembles wet sand. Press firmly and evenly into the prepared pan using the flat bottom of a measuring cup. This compression creates a solid foundation that holds together when cut rather than crumbling apart.
- Condensed Milk Magic:
- Pour sweetened condensed milk in an even layer over the crust, ensuring complete coverage into corners and edges. This crucial layer works as the binding agent that transforms during baking, creating the distinctive chewy texture and caramel-like flavor that makes these bars truly magical.
- Perfect Layering:
- Sprinkle chocolate chips evenly across the condensed milk layer, followed by coconut flakes and chopped nuts. The order matters—chocolate chips should touch the warm condensed milk to promote proper melting, while coconut and nuts stay on top where they can toast perfectly during baking.
- Gentle Pressing:
- Use the back of a fork to lightly press the toppings into the condensed milk layer. This simple step ensures proper adhesion without disturbing the distinct layers. Avoid pressing too firmly, which would cause the toppings to sink completely into the condensed milk rather than creating the signature layered appearance.
- Careful Baking:
- Bake until the edges turn golden brown and the coconut develops a toasty color, approximately 25 minutes. The center may still look slightly soft but will set completely upon cooling. Resist the urge to overbake, which would make the bars hard rather than chewy.
- Complete Cooling:
- Allow the bars to cool completely in the pan before attempting to lift out or cut. This patience is essential—the condensed milk needs time to set properly, and the chocolate chips must solidify enough to prevent smearing when cut. For cleanest results, cooling overnight produces perfect bars.
- Perfect Cutting:
- For professional-looking squares, use a sharp knife dipped in hot water and wiped dry between cuts. Make firm, decisive cuts rather than dragging the knife through the layers. If refrigerated, allow the bars to come to room temperature before serving for the best texture and flavor.
 Save
Save
My grandmother always emphasized that patience makes the difference between good desserts and great ones. When I first attempted these bars as a teenager, I couldn't wait for them to cool completely and ended up with a delicious but messy creation. Now I follow her wisdom and allow proper setting time, resulting in beautiful, defined layers that showcase each component perfectly. These time-tested recipes often contain hidden lessons beyond just ingredients and measurements.
Serving Suggestions
These versatile bars adapt beautifully to various serving situations without additional effort. For casual gatherings, arrange cut bars on a simple platter for easy self-service. During holiday seasons, cut into smaller pieces and arrange on decorative platters alongside other cookies for impressive cookie trays. For special occasions, serve slightly warmed with a scoop of vanilla ice cream and caramel drizzle for an elevated dessert experience. Consider packaging individual bars in clear cellophane bags tied with colorful ribbons for homemade gifts that showcase the beautiful layers.
Creative Variations
Transform this adaptable recipe by experimenting with different combinations of toppings. Create a tropical version by substituting white chocolate chips and adding dried pineapple pieces. For chocolate lovers, use chocolate graham crackers for the crust and add a layer of peanut butter chips alongside the chocolate chips. Holiday adaptations might include crushed peppermint candies during Christmas or butterscotch chips with pecans for fall gatherings. For those who prefer less sweetness, dark chocolate chips balance the sweetened condensed milk beautifully while providing sophisticated flavor.
Storage Strategy
Maintain optimal texture and flavor by following proper storage techniques. Store completely cooled bars in an airtight container at room temperature, placing parchment paper between layers to prevent sticking. They remain fresh for up to 4 days, developing even deeper flavor as they sit. For longer storage, refrigerate for up to a week, allowing them to return to room temperature before serving for the best texture and flavor. These bars freeze beautifully for up to 3 months when wrapped individually in plastic wrap and stored in a freezer-safe container.
These magic cookie bars illustrate perfectly how simple ingredients layered thoughtfully can create something truly spectacular. Their enduring popularity spans generations because they deliver consistent, crowd-pleasing results with minimal effort. Whether prepared for a cookie exchange, holiday gathering, or simple family treat, these bars combine convenience and deliciousness in a way that makes them genuinely magical in both name and nature.
 Save
Save
Common Questions About Cooking
- → What kind of nuts work best in Magic Cookie Bars?
- Walnuts and pecans are the most popular choices, but you can use any nuts you prefer - almonds, macadamia nuts, or even a mixture. For a nut-free version, substitute with additional chocolate chips or butterscotch chips.
- → Can I customize the toppings in Magic Cookie Bars?
- Absolutely! Try butterscotch or white chocolate chips instead of (or in addition to) semisweet chocolate. Add toffee bits, M&Ms, or dried cranberries for different flavors. You can even omit the coconut if you're not a fan.
- → Why are they called 'Magic' Cookie Bars?
- They're called 'magic' because of how the sweetened condensed milk transforms during baking, binding all the ingredients together and creating a gooey, delicious treat with minimal effort - almost like magic!
- → How do I know when Magic Cookie Bars are done baking?
- The edges should be lightly golden brown, and the top should appear set. The bars will still be somewhat soft when you remove them from the oven but will firm up as they cool completely.
- → How far in advance can I make Magic Cookie Bars?
- These bars are great for making ahead! You can prepare them 2-3 days before serving and store at room temperature, up to a week if refrigerated, or up to 3 months if frozen. They actually taste even better after the flavors have had time to meld together.